Add authorization to an Express.js API application
This guide demonstrates how to integrate Auth0 with any new or existing Express.js API application using the express-oauth2-jwt-bearer package.
If you have not created an API in your Auth0 dashboard yet, use the interactive selector to create a new Auth0 API or select an existing project API.
To set up your first API through the Auth0 dashboard, review our getting started guide. Each Auth0 API uses the API Identifier, which your application needs to validate the access token.
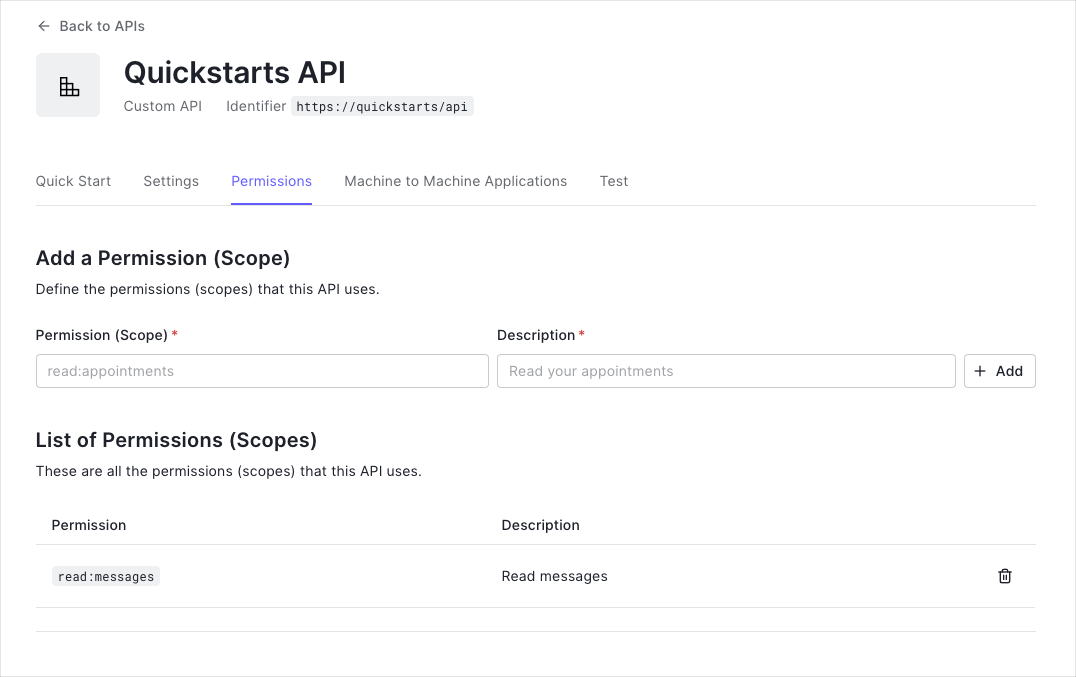
Permissions let you define how resources can be accessed on behalf of the user with a given access token. For example, you might choose to grant read access to the messages resource if users have the manager access level, and a write access to that resource if they have the administrator access level.
You can define allowed permissions in the Permissions view of the Auth0 Dashboard's APIs section.

First, install the SDK with npm.
npm install --save express-oauth2-jwt-bearerWas this helpful?
Configure express-oauth2-jwt-bearer with your Domain and API Identifier.
The checkJwt middleware shown to the right checks if the user's access token included in the request is valid. If the token is not valid, the user gets a 401 Authorization error when they try to access the endpoints.
The middleware does not check if the token has sufficient scope to access the requested resources.
To protect an individual route by requiring a valid JWT, configure the route with the checkJwt middleware constructed from express-oauth2-jwt-bearer.
You can configure individual routes to look for a particular scope. To achieve that, set up another middleware with the requiresScope method. Provide the required scopes and apply the middleware to any routes you want to add authorization to.
Pass the checkJwt and requiredScopes middlewares to the route you want to protect.
In this configuration, only access tokens with the read:messages scope can access the endpoint.
Make a Call to Your API
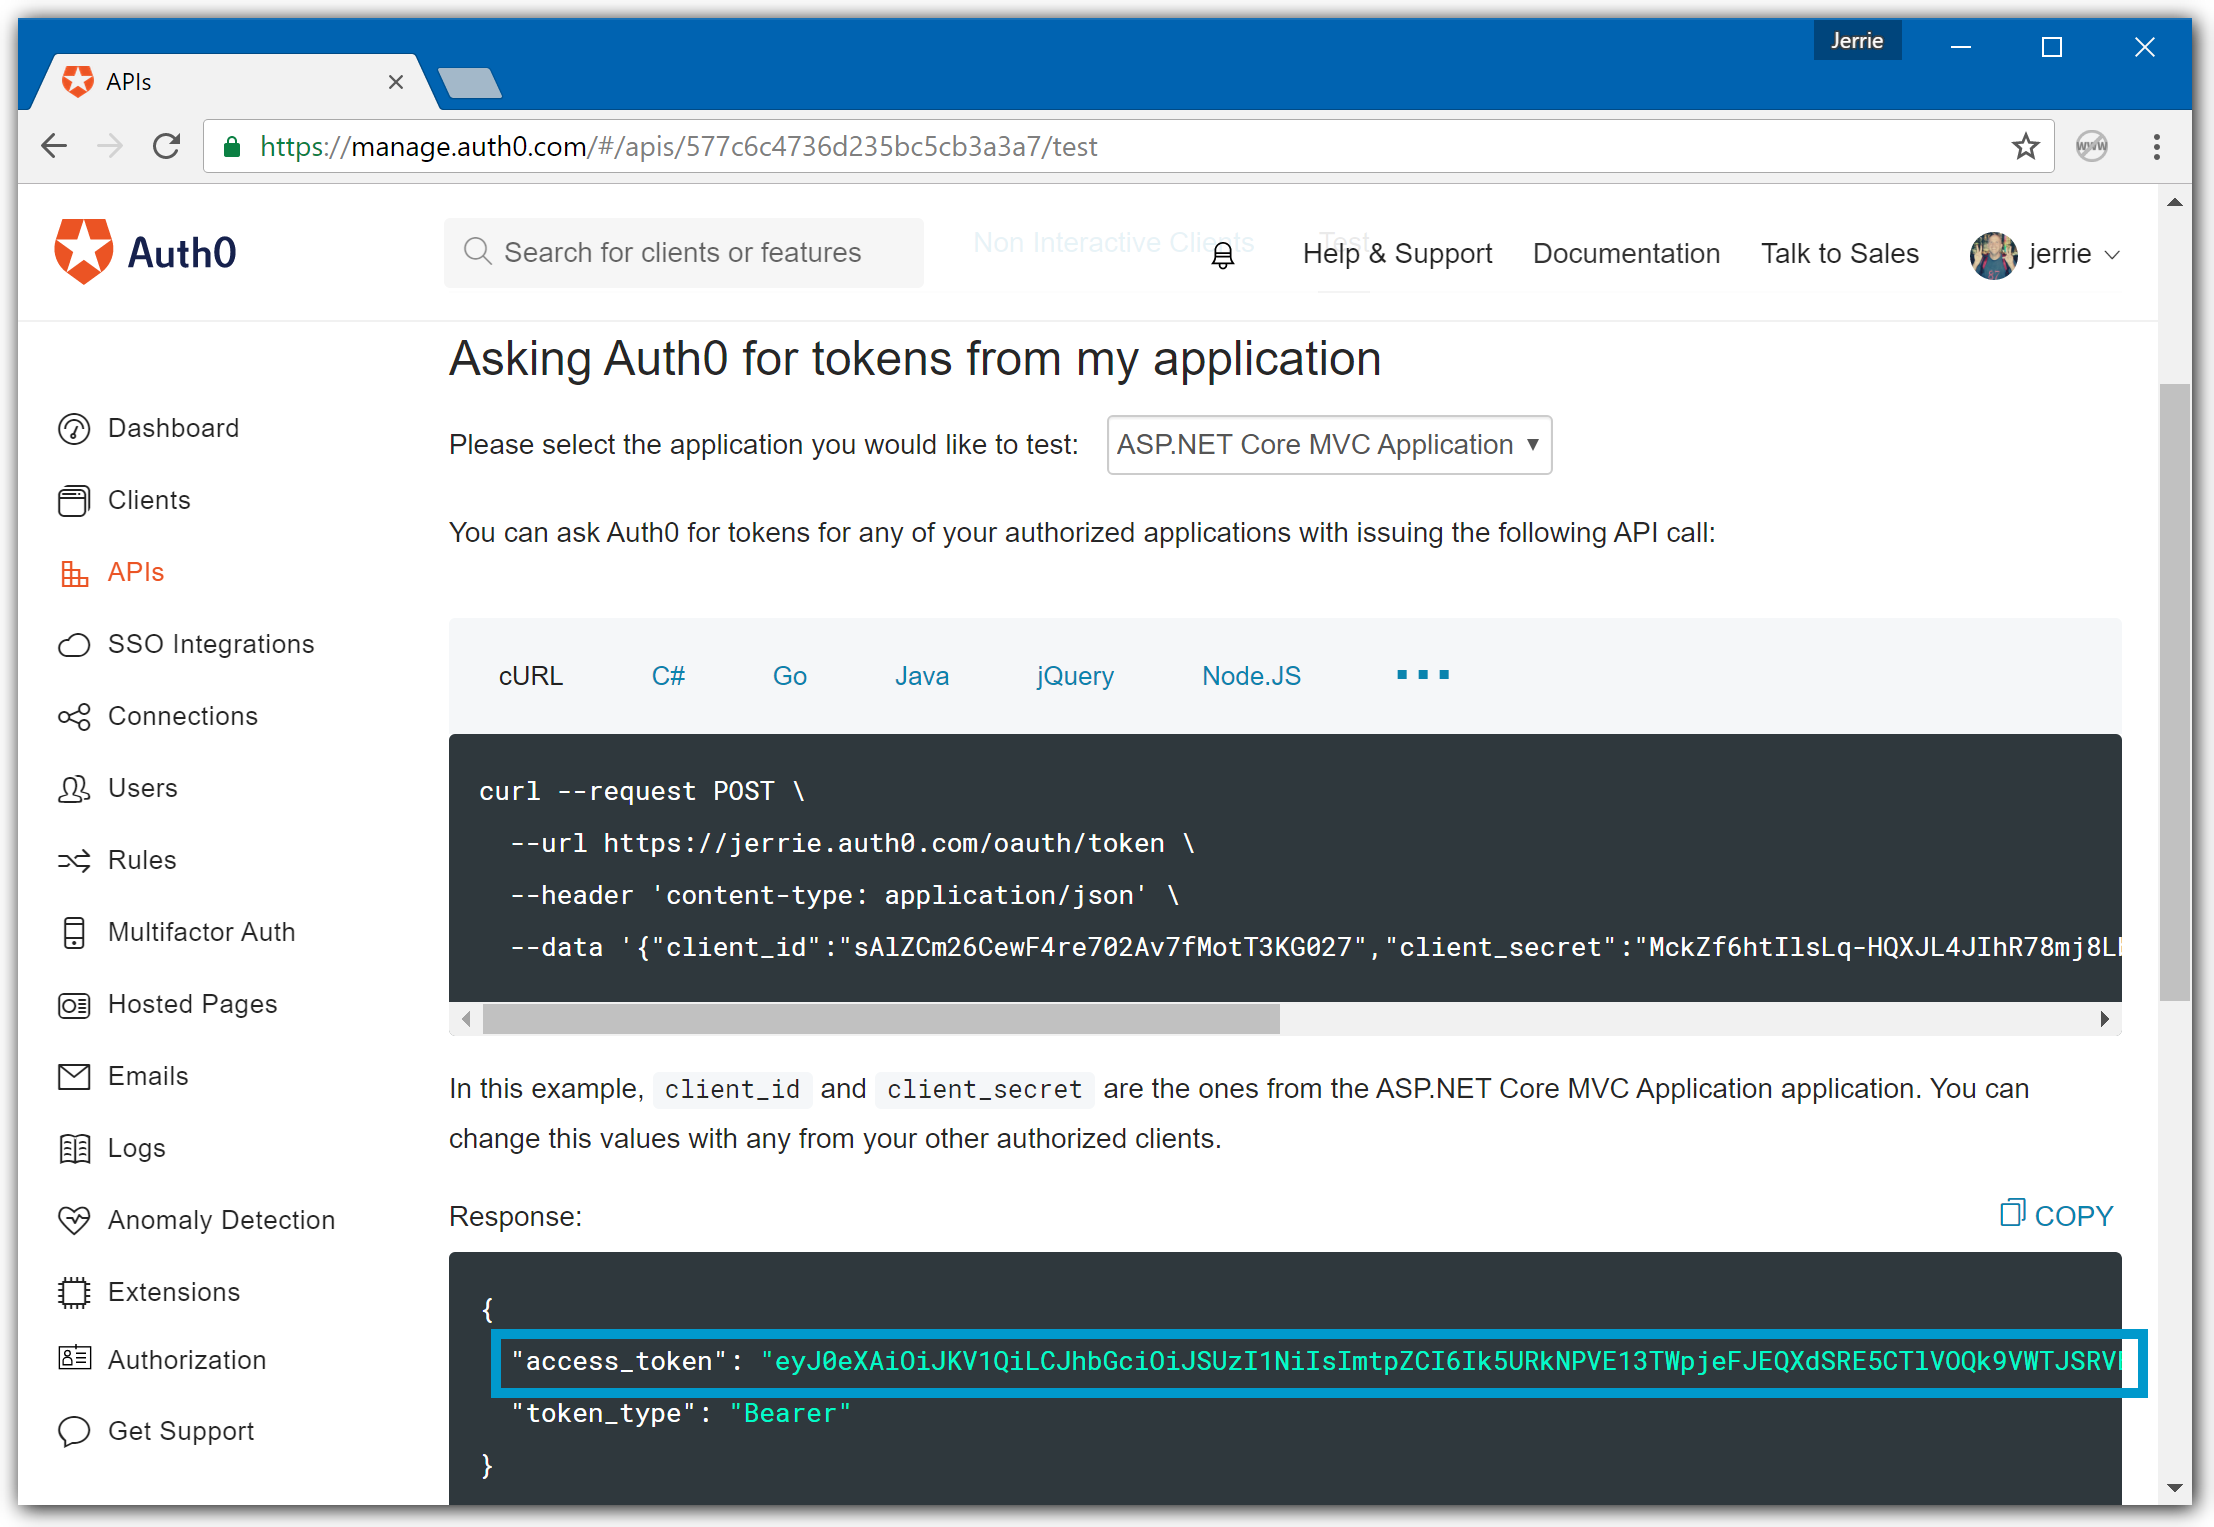
To make calls to your API, you need an Access Token. You can get an Access Token for testing purposes from the Test view in your API settings.

Provide the Access Token as an Authorization header in your requests.
curl --request GET \
  --url http://your-domain.com/api_path \
  --header 'authorization: Bearer YOUR_ACCESS_TOKEN_HERE'
Was this helpful?
var client = new RestClient("http://your-domain.com/api_path");
var request = new RestRequest(Method.GET);
request.AddHeader("authorization", "Bearer YOUR_ACCESS_TOKEN_HERE");
IRestResponse response = client.Execute(request);
Was this helpful?
package main

import (
	"fmt"
	"net/http"
	"io/ioutil"
)

func main() {

	url := "http://your-domain.com/api_path"

	req, _ := http.NewRequest("GET", url, nil)

	req.Header.Add("authorization", "Bearer YOUR_ACCESS_TOKEN_HERE")

	res, _ := http.DefaultClient.Do(req)

	defer res.Body.Close()
	body, _ := ioutil.ReadAll(res.Body)

	fmt.Println(res)
	fmt.Println(string(body))

}
Was this helpful?
HttpResponse<String> response = Unirest.get("http://your-domain.com/api_path")
  .header("authorization", "Bearer YOUR_ACCESS_TOKEN_HERE")
  .asString();
Was this helpful?
var axios = require("axios").default;

var options = {
  method: 'GET',
  url: 'http://your-domain.com/api_path',
  headers: {authorization: 'Bearer YOUR_ACCESS_TOKEN_HERE'}
};

axios.request(options).then(function (response) {
  console.log(response.data);
}).catch(function (error) {
  console.error(error);
});
Was this helpful?
#import <Foundation/Foundation.h>

NSDictionary *headers = @{ @"authorization": @"Bearer YOUR_ACCESS_TOKEN_HERE" };

NSMutableURLRequest *request = [NSMutableURLRequest requestWithURL:[NSURL URLWithString:@"http://your-domain.com/api_path"]
                                                       cachePolicy:NSURLRequestUseProtocolCachePolicy
                                                   timeoutInterval:10.0];
[request setHTTPMethod:@"GET"];
[request setAllHTTPHeaderFields:headers];

NSURLSession *session = [NSURLSession sharedSession];
NSURLSessionDataTask *dataTask = [session dataTaskWithRequest:request
                                            completionHandler:^(NSData *data, NSURLResponse *response, NSError *error) {
                                                if (error) {
                                                    NSLog(@"%@", error);
                                                } else {
                                                    NSHTTPURLResponse *httpResponse = (NSHTTPURLResponse *) response;
                                                    NSLog(@"%@", httpResponse);
                                                }
                                            }];
[dataTask resume];
Was this helpful?
$curl = curl_init();

curl_setopt_array($curl, [
  CURLOPT_URL => "http://your-domain.com/api_path",
  CURLOPT_RETURNTRANSFER => true,
  CURLOPT_ENCODING => "",
  CURLOPT_MAXREDIRS => 10,
  CURLOPT_TIMEOUT => 30,
  CURLOPT_HTTP_VERSION => CURL_HTTP_VERSION_1_1,
  CURLOPT_CUSTOMREQUEST => "GET",
  CURLOPT_HTTPHEADER => [
    "authorization: Bearer YOUR_ACCESS_TOKEN_HERE"
  ],
]);

$response = curl_exec($curl);
$err = curl_error($curl);

curl_close($curl);

if ($err) {
  echo "cURL Error #:" . $err;
} else {
  echo $response;
}
Was this helpful?
import http.client

conn = http.client.HTTPConnection("your-domain.com")

headers = { 'authorization': "Bearer YOUR_ACCESS_TOKEN_HERE" }

conn.request("GET", "/api_path", headers=headers)

res = conn.getresponse()
data = res.read()

print(data.decode("utf-8"))
Was this helpful?
require 'uri'
require 'net/http'

url = URI("http://your-domain.com/api_path")

http = Net::HTTP.new(url.host, url.port)

request = Net::HTTP::Get.new(url)
request["authorization"] = 'Bearer YOUR_ACCESS_TOKEN_HERE'

response = http.request(request)
puts response.read_body
Was this helpful?
import Foundation

let headers = ["authorization": "Bearer YOUR_ACCESS_TOKEN_HERE"]

let request = NSMutableURLRequest(url: NSURL(string: "http://your-domain.com/api_path")! as URL,
                                        cachePolicy: .useProtocolCachePolicy,
                                    timeoutInterval: 10.0)
request.httpMethod = "GET"
request.allHTTPHeaderFields = headers

let session = URLSession.shared
let dataTask = session.dataTask(with: request as URLRequest, completionHandler: { (data, response, error) -> Void in
  if (error != nil) {
    print(error)
  } else {
    let httpResponse = response as? HTTPURLResponse
    print(httpResponse)
  }
})

dataTask.resume()
Was this helpful?
Checkpoint
Now that you have configured your application, run your application to verify that:
GET /api/publicis available for non-authenticated requests.GET /api/privateis available for authenticated requests.GET /api/private-scopedis available for authenticated requests containing an access token with theread:messagesscope.
Next Steps
Excellent work! If you made it this far, you should now have login, logout, and user profile information running in your application.
This concludes our quickstart tutorial, but there is so much more to explore. To learn more about what you can do with Auth0, check out:
- Auth0 Dashboard - Learn how to configure and manage your Auth0 tenant and applications
- express-oauth2-jwt-bearer SDK - Explore the SDK used in this tutorial more fully
- Auth0 Marketplace - Discover integrations you can enable to extend Auth0’s functionality

Sign up for an or to your existing account to integrate directly with your own tenant.