Flutter
By Steve Hobbs
This tutorial demonstrates how to add user login with Auth0 to an Android, iOS, or macOS Flutter app using the Auth0 Flutter SDKWe recommend that you log in to follow this quickstart with examples configured for your account.
I want to integrate with my app
15 minutesI want to explore a sample app
2 minutesGet a sample configured with your account settings or check it out on Github.
Add login to your Flutter app
Auth0 allows you to quickly add authentication and access user profile information in your app. This guide demonstrates how to integrate Auth0 with a Flutter app using the Auth0 Flutter SDK.
Getting started
This quickstart assumes you already have a Flutter app up and running. If not, check out the Flutter "getting started" guides to get started with a simple app.
You should also be familiar with the Flutter command line tool.
Finally, you will need a Native Auth0 application. If you don’t have a Native Auth0 application already, create one before continuing. Avoid using other application types, as they have different configurations and may cause errors.
Configure the callback and logout URLs
The callback and logout URLs are the URLs that Auth0 invokes to redirect back to your app. Auth0 invokes the callback URL after authenticating the user, and the logout URL after removing the session cookie.
If the callback and logout URLs are not set, users will be unable to log in and out of the app and will get an error.
Go to the settings page of your Auth0 application and add the following URLs to Allowed Callback URLs and Allowed Logout URLs, depending on the platform of your app. If you have a custom domain, use this instead of the Auth0 domain from the settings page.
Android
SCHEME://{yourDomain}/android/YOUR_PACKAGE_NAME/callbackWas this helpful?
iOS
https://{yourDomain}/ios/YOUR_BUNDLE_IDENTIFIER/callback,
YOUR_BUNDLE_IDENTIFIER://{yourDomain}/ios/YOUR_BUNDLE_IDENTIFIER/callback
Was this helpful?
macOS
https://{yourDomain}/macos/YOUR_BUNDLE_IDENTIFIER/callback,
YOUR_BUNDLE_IDENTIFIER://{yourDomain}/macos/YOUR_BUNDLE_IDENTIFIER/callback
Was this helpful?
For example, if your iOS bundle identifier were com.example.MyApp and your Auth0 domain were example.us.auth0.com, then this value would be:
https://example.us.auth0.com/ios/com.example.MyApp/callback,
com.example.MyApp://example.us.auth0.com/ios/com.example.MyApp/callback
Was this helpful?
Install the Auth0 Flutter SDK
Add the Auth0 Flutter SDK into the project:
flutter pub add auth0_flutterWas this helpful?
Configure Android
If you are not developing for the Android platform, skip this step.
The SDK requires manifest placeholders. Auth0 uses placeholders internally to define an intent-filter, which captures the authentication callback URL. You must set the Auth0 tenant domain and the callback URL scheme.
Modify app/build.gradle to include manifest placeholders for auth0Domain and auth0Scheme inside the defaultConfig section:
apply plugin: 'com.android.application'

android {
    defaultConfig {
        applicationId "com.auth0.samples"
        minSdkVersion 21
        targetSdkVersion flutter.targetSdkVersion
        // ...

        // ---> Add the next line
        manifestPlaceholders += [auth0Domain: "{yourDomain}", auth0Scheme: "https"]
        // <---
    }
}
Was this helpful?
auth0Domain: The domain of your Auth0 tenant. Generally, you find this in the Auth0 Dashboard under your Application Settings in the Domain field. If you are using a custom domain, you should set this to the value of your custom domain instead.auth0Scheme: The scheme to use. Can be a custom scheme, orhttpsif you want to use Android App Links. You can read more about setting this value in the Auth0.Android SDK README.
Run Sync Project with Gradle Files inside Android Studio to apply your changes.
Configure iOS/macOS
If you are not developing for the iOS or macOS platforms, skip this step.
Configure the Team ID and bundle identifier
Go to the settings page of your Auth0 application, scroll to the end, and open Advanced Settings > Device Settings. In the iOS section, set Team ID to your Apple Team ID, and App ID to your app's bundle identifier.
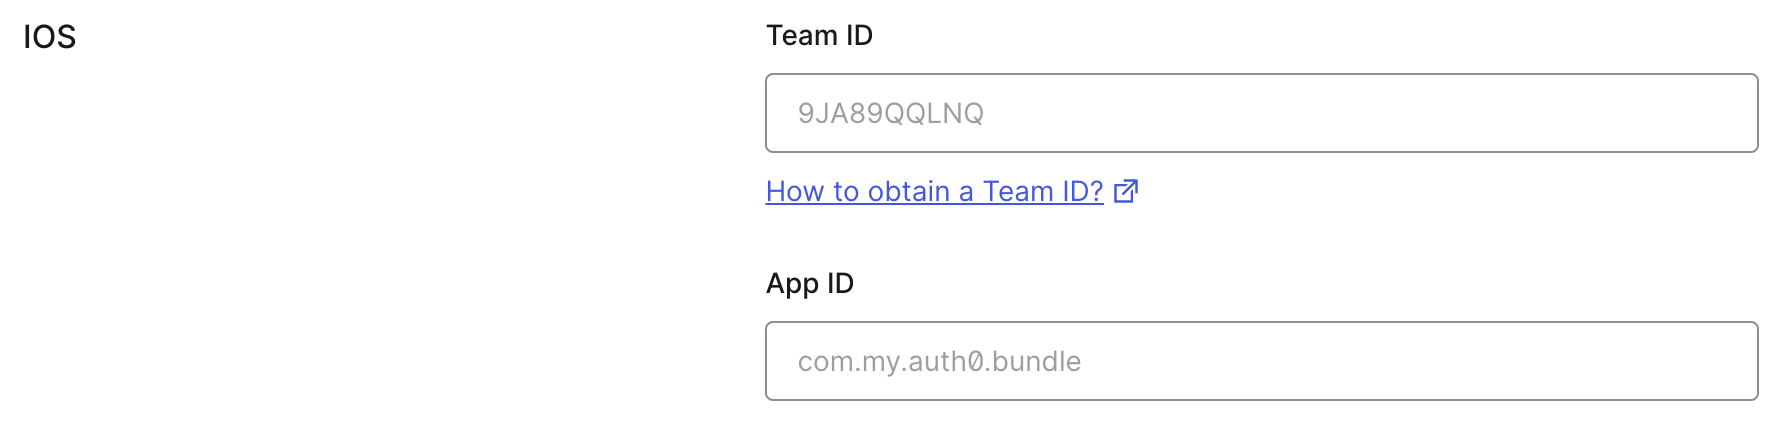
This will add your app to your Auth0 tenant's apple-app-site-association file.
Add the associated domain capability
Open your app in Xcode by running open ios/Runner.xcworkspace (or open macos/Runner.xcworkspace for macOS). Go to the Signing and Capabilities tab of the Runner target settings, and press the + Capability button. Then select Associated Domains.
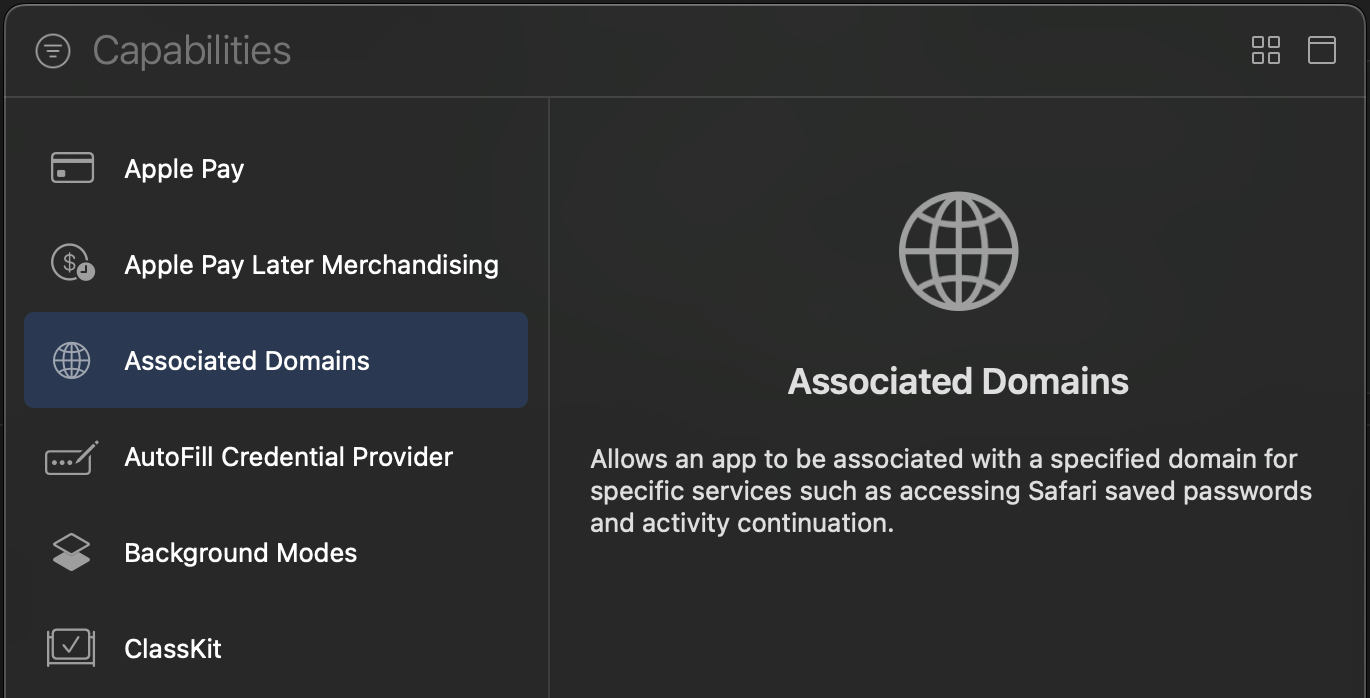
Next, add the following entry under Associated Domains:
webcredentials:{yourDomain}Was this helpful?
If you have a custom domain, use this instead of the Auth0 domain from the settings page.
Add login to your app
Universal Login is the easiest way to set up authentication in your app. We recommend using it for the best experience, best security, and the fullest array of features.
Integrate Auth0 Universal Login in your Flutter app by importing the SDK and instantiating the Auth0 class using your Auth0 domain and Client ID values. See this example, which instantiates the class inside a widget state object:
import 'package:auth0_flutter/auth0_flutter.dart';

class MainView extends StatefulWidget {
  const MainView({Key? key}) : super(key: key);

  @override
  State<MainView> createState() => _MainViewState();
}

class _MainViewState extends State<MainView> {
  Credentials? _credentials;

  late Auth0 auth0;

  @override
  void initState() {
    super.initState();
    auth0 = Auth0('{yourDomain}', '{yourClientId}');
  }

  @override
  Widget build(BuildContext context) {
    // ...
  }
}
Was this helpful?
Next, redirect your users to the Auth0 Universal Login page using webAuthentication().login(). This is a Future and must be awaited for you to retrieve the user's tokens. See this example of a ElevatedButton widget that logs the user in when clicked. Note that _credentials is used to determine locally within your app whether or not a user is signed in:
if (_credentials == null) {
  ElevatedButton(
    onPressed: () async {
      // Use a Universal Link callback URL on iOS 17.4+ / macOS 14.4+
      // useHTTPS is ignored on Android
      final credentials =
          await auth0.webAuthentication().login(useHTTPS: true);

      setState(() {
        _credentials = credentials;
      });
    },
    child: const Text("Log in")
  )
}
Was this helpful?
Android: if you are using a custom scheme, pass this scheme to the login method so that the SDK can route to the login page and back again correctly:
await auth0.webAuthentication(scheme: 'YOUR CUSTOM SCHEME').login();Was this helpful?
When a user logs in, they are redirected back to your app. Then, you are able to access the ID and access tokens for this user.
checkpoint.header
Add a button to your app that calls webAuthentication().login() and logs the user into your app. Verify that you are redirected to Auth0 for authentication and then back to your app.
Verify that you can get access to the tokens on the result of calling login.
Add logout to your app
To log users out, redirect them to the Auth0 logout endpoint to clear their login session by calling the Auth0 Flutter SDK webAuthentication().logout(). Read more about logging out of Auth0.
See this example of an ElevatedButton widget that logs the user out of the app. Note that _credentials is set to null, indicating that the user is no longer signed in to your app:
ElevatedButton(
  onPressed: () async {
    // Use a Universal Link logout URL on iOS 17.4+ / macOS 14.4+
    // useHTTPS is ignored on Android
    await auth0.webAuthentication().logout(useHTTPS: true);

    setState(() {
      _credentials = null;
    });
  },
  child: const Text("Log out"))
Was this helpful?
Android: if you are using a custom scheme, pass this scheme to the logout method so that the SDK can route back to your app correctly:
await auth0.webAuthentication(scheme: 'YOUR CUSTOM SCHEME').logout();Was this helpful?
checkpoint.header
Add a button to your app that calls webAuthentication().logout() and logs the user out of your app. When you select it, verify that your Flutter app redirects you to the logout endpoint and back again. You should not be logged in to your app.
Show user profile information
The user profile automatically retrieves user profile properties for you when you call webAuthentication().login(). The returned object from the login step contains a user property with all the user profile properties, which populates by decoding the ID token.
See this example of a View component that displays the user profile on the screen:
import 'package:auth0_flutter/auth0_flutter.dart';
import 'package:flutter/material.dart';

class ProfileView extends StatelessWidget {
  const ProfileView({Key? key, required this.user}) : super(key: key);

  final UserProfile user;

  @override
  Widget build(BuildContext context) {
    return Column(
      mainAxisAlignment: MainAxisAlignment.center,
      children: [
        if (user.name != null) Text(user.name!),
        if (user.email != null) Text(user.email!)
      ],
    );
  }
}
Was this helpful?
checkpoint.header
Log in and inspect the user property on the result. Verify the current user's profile information, such as email or name.