ASP.NET Core v2.1: Login
By Damien Guard
This tutorial demonstrates how to add user login to an ASP.NET Core 2.x application. We recommend that you log in to follow this quickstart with examples configured for your account.
I want to integrate with my app
15 minutesI want to explore a sample app
2 minutesGet a sample configured with your account settings or check it out on Github.
Configure Auth0
Get Your Application Keys
When you signed up for Auth0, a new application was created for you, or you could have created a new one. You will need some details about that application to communicate with Auth0. You can get these details from the Application Settings section in the Auth0 dashboard.
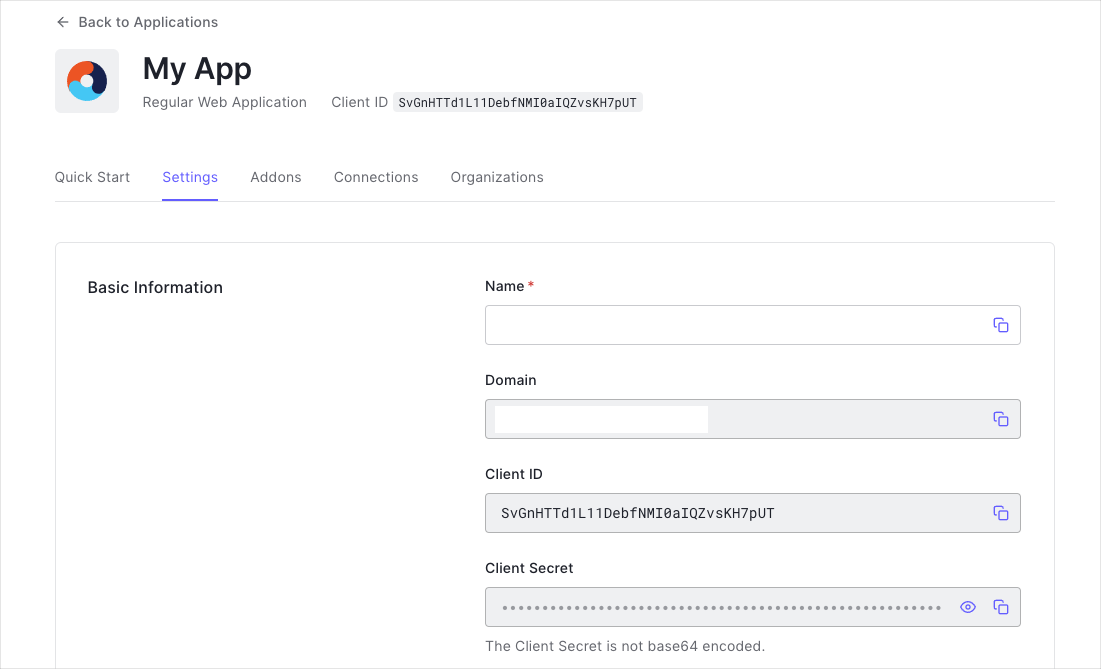
You need the following information:
- Domain
- Client ID
- Client Secret
Configure Callback URLs
The Callback URL of your application is the URL where Auth0 will redirect to after the user has authenticated in order for the OpenID Connect middleware to complete the authentication process.
You will need to add this URL to the list of Allowed URLs for your application. The Callback URL for the seed project is http://localhost:3000/callback, so be sure to add this to the Allowed Callback URLs section of your application.
If you deploy your application to a different URL you will also need to ensure to add that URL to the Allowed Callback URLs. For ASP.NET Core this URL will take the format https://YOUR_APPLICATION_URL/callback.
Configure Logout URLs
A logout URL is a URL in your application that Auth0 can return to after the user has been logged out of the authorization server. This is specified in the returnTo query parameter. The logout URL for your app must be added to the Allowed Logout URLs field in your Application Settings. If this field is not set, users will be unable to log out from the application and will get an error.
Configure JSON Web Token signature algorithm
The ASP.NET Core OpenID Connect (OIDC) middleware which will be used to authenticate the user, requires that the JSON Web Token (JWT) be signed with an asymmetric key. To configure this go to the settings for your application in the Auth0 Dashboard, scroll down and click on Show Advanced Settings. Go to the OAuth tab and set the JsonWebToken Signature Algorithm to RS256.
Save your changes.
Configure Your Application to Use Auth0
Universal Login is the easiest way to set up authentication in your application. We recommend using it for the best experience, best security and the fullest array of features. This guide will use it to provide a way for your users to log in to your ASP.NET Core application.
Install dependencies
To integrate Auth0 with ASP.NET Core you will use the Cookie and OpenID Connect (OIDC) authentication handlers. The seed project already references the ASP.NET Core metapackage (Microsoft.AspNetCore.App) which includes all NuGet packages shipped by Microsoft as part of ASP.NET Core 2.1, including the packages for the Cookie and OIDC authentication handlers.
If you are adding this to your own existing project, and you have not referenced the metapackage, then please make sure that you add the Microsoft.AspNetCore.Authentication.Cookies and Microsoft.AspNetCore.Authentication.OpenIdConnect packages to your application.
Install-Package Microsoft.AspNetCore.Authentication.Cookies
Install-Package Microsoft.AspNetCore.Authentication.OpenIdConnect
Was this helpful?
Install and configure OpenID Connect Middleware
To enable authentication in your ASP.NET Core application, use the OpenID Connect (OIDC) middleware.
Go to the ConfigureServices method of your Startup class. To add the authentication services, call the AddAuthentication method. To enable cookie authentication, call the AddCookie method.
Next, configure the OIDC authentication handler. Add a call to AddOpenIdConnect. To configure the authentication scheme, pass "Auth0" as the authenticationScheme parameter. You will use this value later to challenge the OIDC middleware.
Configure other parameters, such as ClientId, ClientSecret or ResponseType.
By default, the OIDC middleware requests both the openid and profile scopes. Because of that, you may get a large ID Token in return. We suggest that you ask only for the scopes you need. You can read more about requesting additional scopes in the User Profile step.
// Startup.cs

public void ConfigureServices(IServiceCollection services)
{
    // Cookie configuration for HTTP to support cookies with SameSite=None
    services.ConfigureSameSiteNoneCookies();

    // Cookie configuration for HTTPS
    // services.Configure<CookiePolicyOptions>(options =>
    // {
    //     options.MinimumSameSitePolicy = SameSiteMode.None;
    // });

    // Add authentication services
    services.AddAuthentication(options => {
        options.DefaultAuthenticateScheme = CookieAuthenticationDefaults.AuthenticationScheme;
        options.DefaultSignInScheme = CookieAuthenticationDefaults.AuthenticationScheme;
        options.DefaultChallengeScheme = CookieAuthenticationDefaults.AuthenticationScheme;
    })
    .AddCookie()
    .AddOpenIdConnect("Auth0", options => {
        // Set the authority to your Auth0 domain
        options.Authority = $"https://{Configuration["Auth0:Domain"]}";

        // Configure the Auth0 Client ID and Client Secret
        options.ClientId = Configuration["Auth0:ClientId"];
        options.ClientSecret = Configuration["Auth0:ClientSecret"];

        // Set response type to code
        options.ResponseType = OpenIdConnectResponseType.Code;

        // Configure the scope
        options.Scope.Clear();
        options.Scope.Add("openid");

        // Set the callback path, so Auth0 will call back to http://localhost:3000/callback
        // Also ensure that you have added the URL as an Allowed Callback URL in your Auth0 dashboard
        options.CallbackPath = new PathString("/callback");

        // Configure the Claims Issuer to be Auth0
        options.ClaimsIssuer = "Auth0";
    });

    // Add framework services.
    services.AddMvc()
        .SetCompatibilityVersion(CompatibilityVersion.Version_2_1);
}
Was this helpful?
Next, add the authentication middleware. In the Configure method of the Startup class, call the UseAuthentication method.
// Startup.cs

public void Configure(IApplicationBuilder app, IHostingEnvironment env)
{
    if (env.IsDevelopment())
    {
        app.UseDeveloperExceptionPage();
    }
    else
    {
        app.UseExceptionHandler("/Home/Error");
        app.UseHsts();
    }

    app.UseStaticFiles();
    app.UseCookiePolicy();

    app.UseAuthentication();

    app.UseMvc(routes =>
    {
        routes.MapRoute(
            name: "default",
            template: "{controller=Home}/{action=Index}/{id?}");
    });
}

}
Was this helpful?
Trigger Authentication
Add the Login and Logout methods
Add the Login and Logout actions to AccountController.
To add the Login action, call ChallengeAsync and pass "Auth0" as the authentication scheme. This will invoke the OIDC authentication handler you registered in the ConfigureServices method.
After the OIDC middleware signs the user in, the user is also automatically signed in to the cookie middleware. This allows the user to be authenticated on subsequent requests.
For the Logout action, you need to sign the user out of both middlewares.
The RedirectUri passed in both instances indicates where the user is redirected after they log in or fail to log in.
// Controllers/AccountController.cs

using Microsoft.AspNetCore.Authentication;
using Microsoft.AspNetCore.Authentication.Cookies;

public class AccountController : Controller
{
    public async Task Login(string returnUrl = "/")
    {
        await HttpContext.ChallengeAsync("Auth0", new AuthenticationProperties() { RedirectUri = returnUrl });
    }

    [Authorize]
    public async Task Logout()
    {
        await HttpContext.SignOutAsync("Auth0", new AuthenticationProperties
        {
            // Indicate here where Auth0 should redirect the user after a logout.
            // Note that the resulting absolute Uri must be added to the
            // **Allowed Logout URLs** settings for the app.
            RedirectUri = Url.Action("Index", "Home")
        });
        await HttpContext.SignOutAsync(CookieAuthenticationDefaults.AuthenticationScheme);
    }
}
Was this helpful?
ASP.NET Core calls SignOutAsync for the "Auth0" authentication scheme. You need to provide the OIDC middleware with the URL for logging the user out of Auth0. To set the URL, handle the OnRedirectToIdentityProviderForSignOut event when you register the OIDC authentication handler.
When the application calls SignOutAsync for the OIDC middleware, it also calls the /v2/logout endpoint of the Auth0 Authentication API. The user is logged out of Auth0.
If you specify the returnTo parameter, the users will be redirected there after they are logged out. Specify the URL for redirecting users in the Allowed Logout URLs field in your Application Settings.
In the Startup.cs file, update the call to AddOpenIdConnect with the following code:
// Startup.cs

public void ConfigureServices(IServiceCollection services)
{
    // Some code omitted for brevity...

    // Add authentication services
    services.AddAuthentication(options => {
        //...
    })
    .AddCookie()
    .AddOpenIdConnect("Auth0", options => {
        // ...

        options.Events = new OpenIdConnectEvents
        {
            // handle the logout redirection
            OnRedirectToIdentityProviderForSignOut = (context) =>
            {
                var logoutUri = $"https://{Configuration["Auth0:Domain"]}/v2/logout?client_id={Configuration["Auth0:ClientId"]}";

                var postLogoutUri = context.Properties.RedirectUri;
                if (!string.IsNullOrEmpty(postLogoutUri))
                {
                    if (postLogoutUri.StartsWith("/"))
                    {
                        // transform to absolute
                        var request = context.Request;
                        postLogoutUri = request.Scheme + "://" + request.Host + request.PathBase + postLogoutUri;
                    }
                    logoutUri += $"&returnTo={ Uri.EscapeDataString(postLogoutUri)}";
                }

                context.Response.Redirect(logoutUri);
                context.HandleResponse();

                return Task.CompletedTask;
            }
        };
    });
}
Was this helpful?
Add the Login and Logout buttons
Add the Login and Logout buttons to the navigation bar. In the /Views/Shared/_Layout.cshtml file, in the navigation bar section, add code that displays the Log Out button when the user is authenticated and the Login button if not. The buttons link to the Logout and Login actions in the AccountController:
<!-- Views/Shared/_Layout.cshtml -->

<div class="navbar navbar-inverse navbar-fixed-top">
    <div class="container">
        <div class="navbar-header">
            <button type="button" class="navbar-toggle" data-toggle="collapse" data-target=".navbar-collapse">
                <span class="sr-only">Toggle navigation</span>
                <span class="icon-bar"></span>
                <span class="icon-bar"></span>
                <span class="icon-bar"></span>
            </button>
            <a asp-area="" asp-controller="Home" asp-action="Index" class="navbar-brand">SampleMvcApp</a>
        </div>
        <div class="navbar-collapse collapse">
            <ul class="nav navbar-nav">
                <li><a asp-area="" asp-controller="Home" asp-action="Index">Home</a></li>
            </ul>
            <ul class="nav navbar-nav navbar-right">
                @if (User.Identity.IsAuthenticated)
                {
                    <li><a  asp-controller="Account" asp-action="Logout">Logout</a></li>
                }
                else
                {
                    <li><a asp-controller="Account" asp-action="Login">Login</a></li>
                }
            </ul>
        </div>
    </div>
</div>
Was this helpful?
Run the Application
When the user selects the Login button, the OIDC middleware redirects them to the hosted version of the Lock widget in your Auth0 domain.
About the login flow
- The user clicks on the Login button and is directed to the
Loginroute. - The
ChallengeAsynctells the ASP.NET authentication middleware to issue a challenge to the authentication handler registered with the Auth0authenticationSchemeparameter. The parameter uses the "Auth0" value you passed in the call toAddOpenIdConnectin theStartupclass. - The OIDC handler redirects the user to the Auth0
/authorizeendpoint, which displays the Lock widget. The user can log in with their username and password, social provider or any other identity provider. - Once the user has logged in, Auth0 calls back to the
/callbackendpoint in your application and passes along an authorization code. - The OIDC handler intercepts requests made to the
/callbackpath. - The handler looks for the authorization code, which Auth0 sent in the query string.
- The OIDC handler calls the
/oauth/tokenendpoint to exchange the authorization code for the user's ID and Access Tokens. - The OIDC middleware extracts the user information from the claims on the ID Token.
- The OIDC middleware returns a successful authentication response and a cookie which indicates that the user is authenticated. The cookie contains claims with the user's information. The cookie is stored, so that the cookie middleware will automatically authenticate the user on any future requests. The OIDC middleware receives no more requests, unless it is explicitly challenged.
Obtain an Access Token for Calling an API
If you want to call an API from your MVC application, you need to obtain an Access Token issued for the API you want to call. To obtain the token, pass an additional audience parameter containing the API identifier to the Auth0 authorization endpoint.
In the configuration for the OpenIdConnectOptions object, handle the OnRedirectToIdentityProvider event and add the audience parameter to ProtocolMessage.
// Startup.cs

public void ConfigureServices(IServiceCollection services)
{
    // Some code omitted for brevity...

    services.AddAuthentication(options => {
        //...
    })
    .AddCookie()
    .AddOpenIdConnect("Auth0", options => {
        // ...

        options.Events = new OpenIdConnectEvents
        {
            OnRedirectToIdentityProvider = context =>
            {
                // The context's ProtocolMessage can be used to pass along additional query parameters
                // to Auth0's /authorize endpoint.
                //
                // Set the audience query parameter to the API identifier to ensure the returned Access Tokens can be used
                // to call protected endpoints on the corresponding API.
                context.ProtocolMessage.SetParameter("audience", Configuration["Auth0:Audience"]);

                return Task.FromResult(0);
            }
        };
    });
}
Was this helpful?
Be sure to also update your application's appsettings.json file to include the Audience configuration:
"Auth0": {
    ...
    "Audience": "{yourApiIdentifier}"
}
Was this helpful?
Store and retrieve the tokens
The OIDC middleware in ASP.NET Core automatically decodes the ID Token returned from Auth0 and adds the claims from the ID Token as claims in the ClaimsIdentity. This means that you can use User.Claims.FirstOrDefault("<claim type>").Value to obtain the value of any claim inside any action in your controllers.
The seed project contains a controller action and view that display the claims associated with a user. Once a user has logged in, you can go to /Account/Claims to see these claims.
You may want to store the tokens received from Auth0. For example, you can use the Access Token later to authenticate the user in calls to your API. To achieve this, when calling AddOpenIdConnect, set the SaveTokens property to true. This saves the tokens to AuthenticationProperties:
// Startup.cs

public void ConfigureServices(IServiceCollection services)
{
    // Some code omitted for brevity...

    // Add authentication services
    services.AddAuthentication(options => {
        //...
    })
    .AddCookie()
    .AddOpenIdConnect("Auth0", options => {
        // ...

        // Saves tokens to the AuthenticationProperties
        options.SaveTokens = true;

        options.Events = new OpenIdConnectEvents
        {
            // handle the logout redirection
            OnRedirectToIdentityProviderForSignOut = (context) =>
            {
                //...
            }
        };
    });
}
Was this helpful?
To retrieve the tokens, call HttpContext.GetTokenAsync and use them as required:
// Inside one of your controller actions

if (User.Identity.IsAuthenticated)
{
    string accessToken = await HttpContext.GetTokenAsync("access_token");

    // if you need to check the Access Token expiration time, use this value
    // provided on the authorization response and stored.
    // do not attempt to inspect/decode the access token
    DateTime accessTokenExpiresAt = DateTime.Parse(
        await HttpContext.GetTokenAsync("expires_at"),
        CultureInfo.InvariantCulture,
        DateTimeStyles.RoundtripKind);

    string idToken = await HttpContext.GetTokenAsync("id_token");

    // Now you can use them. For more info on when and how to use the
    // Access Token and ID Token, see https://auth0.com/docs/tokens
}
Was this helpful?
For general information on using APIs with web applications, see the Authorization Code Flow article.