Add Login to your Spring Web Application
To use Auth0 services, you’ll need to have an application set up in the Auth0 Dashboard. The Auth0 application is where you will configure how you want authentication to work for the project you are developing.
Configure an application
Use the interactive selector to create a new Auth0 application or select an existing application that represents the project you want to integrate with. Every application in Auth0 is assigned an alphanumeric, unique client ID that your application code will use to call Auth0 APIs through the SDK.
Any settings you configure using this quickstart will automatically update for your Application in the Dashboard, which is where you can manage your Applications in the future.
If you would rather explore a complete configuration, you can view a sample application instead.
Configure Callback URLs
A callback URL is a URL in your application that you would like Auth0 to redirect users to after they have authenticated. If not set, users will not be returned to your application after they log in.
Configure Logout URLs
A logout URL is a URL in your application that you would like Auth0 to redirect users to after they have logged out. If not set, users will not be able to log out from your application and will receive an error.
Add Spring dependencies
To integrate your Spring Boot application with Auth0, include the Okta Spring Boot Starter in your application's dependencies.
If you're using Gradle, you can include these dependencies as shown below.
plugins {
id 'java'
id 'org.springframework.boot' version '3.1.4'
id 'io.spring.dependency-management' version '1.1.3'
}
implementation 'com.okta.spring:okta-spring-boot-starter:3.0.5'
implementation 'org.springframework.boot:spring-boot-starter-web'
implementation 'org.springframework.boot:spring-boot-starter-thymeleaf'
implementation 'org.thymeleaf.extras:thymeleaf-extras-springsecurity6'
implementation 'nz.net.ultraq.thymeleaf:thymeleaf-layout-dialect'
Was this helpful?
If you are using Maven:
<parent>
<groupId>org.springframework.boot</groupId>
<artifactId>spring-boot-starter-parent</artifactId>
<version>3.1.4</version>
<relativePath/>
</parent>
<dependencies>
<dependency>
<groupId>com.okta</groupId>
<artifactId>okta-spring-boot-starter</artifactId>
<version>3.0.5</version>
</dependency>
<dependency>
<groupId>org.springframework.boot</groupId>
<artifactId>spring-boot-starter-web</artifactId>
</dependency>
<dependency>
<groupId>org.springframework.boot</groupId>
<artifactId>spring-boot-starter-oauth2-client</artifactId>
</dependency>
<dependency>
<groupId>org.springframework.boot</groupId>
<artifactId>spring-boot-starter-thymeleaf</artifactId>
</dependency>
<dependency>
<groupId>org.thymeleaf.extras</groupId>
<artifactId>thymeleaf-extras-springsecurity6</artifactId>
</dependency>
<dependency>
<groupId>nz.net.ultraq.thymeleaf</groupId>
<artifactId>thymeleaf-layout-dialect</artifactId>
</dependency>
</dependencies>
Was this helpful?
The Okta Spring Boot Starter makes it easy to configure your application with Auth0. The sample below uses an application.yml file, though you can also use properties files or any of the other supported externalization mechanisms.
#src/main/resources/application.yml
okta:
oauth2:
issuer: https://{yourDomain}/

client-id: {yourClientId}

client-secret: {yourClientSecret}

#The sample and instructions above for the callback and logout URL configuration use port 3000.
#If you wish to use a different port, change this and be sure your callback and logout URLs are
#configured with the correct port.
server:
port: 3000
Was this helpful?
To enable user login with Auth0, create a class that will register a SecurityFilterChain, and add the @Configuration annotation.
http.authorizeHttpRequests(authorize -> authorize
    .requestMatchers("/").permitAll()

    .anyRequest().authenticated()

);
Was this helpful?
The Okta Spring Boot Starter will use the client configuration you defined earlier to handle login when a user visits the /oauth2/authorization/okta path of your application. You can use this to create a login link in your application.
This page returns the user attributes when the user authentications. You will use the /logout link in the template to implement the logout feature.
Create a controller to handle the incoming request. This controller renders the index.html page. When the user authenticates, the application retrieves the users's profile information attributes to render the page.
checkpoint.header
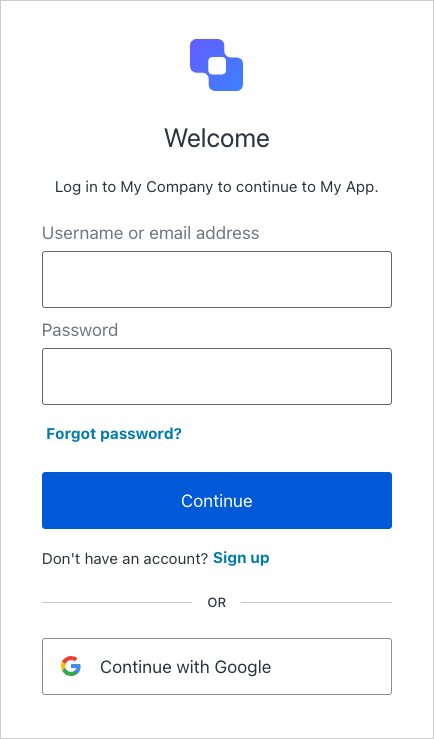
When you click the login link, verify the application redirects you to the Auth0 Universal Login page and that you can now log in or sign up using a username and password or a social provider.
Now that users can log into your application, they need a way to log out. By default, when logout is enabled, Spring Security will log the user out of your application and clear the session. To enable successful logout of Auth0, you can provide a LogoutHandler to redirect users to your Auth0 logout endpoint (https://{yourDomain}/v2/logout) and then immediately redirect them to your application.
In the SecurityConfig class, provide a LogoutHandler that redirects to the Auth0 logout endpoint, and configure the HttpSecurity to add the logout handler
checkpoint.header
When you click logout link, the application should redirect you to the address you specified as one of the "Allowed Logout URLs" in the "Settings" and you are no longer logged in to your application.
Next Steps
Excellent work! If you made it this far, you should now have login, logout, and user profile information running in your application.
This concludes our quickstart tutorial, but there is so much more to explore. To learn more about what you can do with Auth0, check out:
- Auth0 Dashboard - Learn how to configure and manage your Auth0 tenant and applications
- Okta Spring Boot Starter SDK - Explore the SDK used in this tutorial more fully
- Auth0 Marketplace - Discover integrations you can enable to extend Auth0’s functionality

Sign up for an or to your existing account to integrate directly with your own tenant.