ASP.NET (OWIN): Login
By Damien Guard
This tutorial demonstrates how to add user login to an ASP.NET OWIN application. We recommend that you log in to follow this quickstart with examples configured for your account.
I want to integrate with my app
15 minutesI want to explore a sample app
2 minutesGet a sample configured with your account settings or check it out on Github.
Configure Auth0
Get Your Application Keys
When you signed up for Auth0, a new application was created for you, or you could have created a new one. You will need some details about that application to communicate with Auth0. You can get these details from the Application Settings section in the Auth0 dashboard.
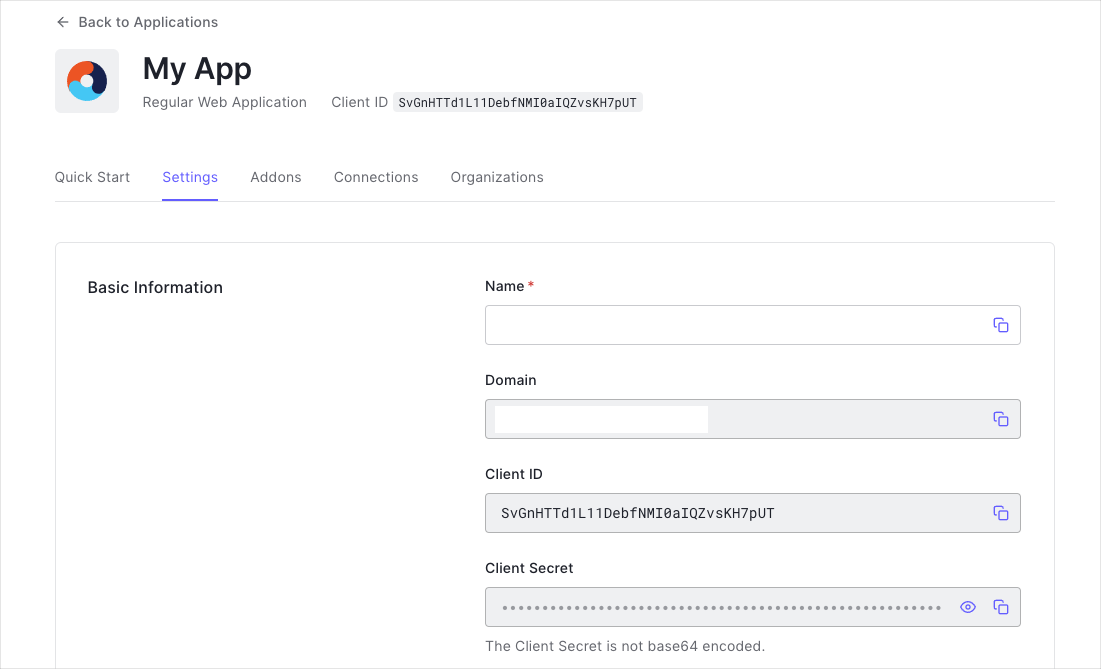
You need the following information:
- Domain
- Client ID
- Client Secret
Configure Callback URLs
The Callback URL of your application is the URL where Auth0 will redirect to after the user has authenticated in order for the OWIN OpenID Connect middleware to complete the authentication process.
You will need to add this URL to the list of Allowed URLs for your application. The Callback URL for the seed project is http://localhost:3000/callback, so be sure to add this to the Allowed Callback URLs section of your application. Also, add http://localhost:3000/ to the Allowed Logout URLs.
If you deploy your application to a different URL you will also need to ensure to add that URL to the Allowed Callback URLs and Allowed Logout URLs. The web.config in the sample projects also contain two keys named auth0:RedirectUri and auth0:PostLogoutRedirectUri with these URLs. Be sure to change those as well.
That's all you need to start working with Auth0!
Configure Your Application to Use Auth0
Universal Login is the easiest way to set up authentication in your application. We recommend using it for the best experience, best security and the fullest array of features. This guide will use it to provide a way for your users to log in to your ASP.NET MVC 5 application.
Install and configure the OpenID Connect middleware
The easiest way to enable authentication with Auth0 in your ASP.NET MVC application is to use the OWIN OpenID Connect middleware which is available in the Microsoft.Owin.Security.OpenIdConnect NuGet package, so install that first:
Install-Package Microsoft.Owin.Security.OpenIdConnectWas this helpful?
You must also install the following middleware library to enable cookie authentication in your project:
Install-Package Microsoft.Owin.Security.CookiesWas this helpful?
Now go to the Configuration method of your Startup class and configure the cookie middleware as well as the Auth0 middleware.
// Startup.cs
using Microsoft.IdentityModel.Protocols.OpenIdConnect;
using Microsoft.IdentityModel.Tokens;
using Microsoft.Owin;
using Microsoft.Owin.Host.SystemWeb;
using Microsoft.Owin.Security;
using Microsoft.Owin.Security.Cookies;
using Microsoft.Owin.Security.OpenIdConnect;
using MvcApplication.Support;
using Owin;

public void Configuration(IAppBuilder app)
{
    // Configure Auth0 parameters
    string auth0Domain = ConfigurationManager.AppSettings["auth0:Domain"];
    string auth0ClientId = ConfigurationManager.AppSettings["auth0:ClientId"];
    string auth0RedirectUri = ConfigurationManager.AppSettings["auth0:RedirectUri"];
    string auth0PostLogoutRedirectUri = ConfigurationManager.AppSettings["auth0:PostLogoutRedirectUri"];

    // Set Cookies as default authentication type
    app.SetDefaultSignInAsAuthenticationType(CookieAuthenticationDefaults.AuthenticationType);
    app.UseCookieAuthentication(new CookieAuthenticationOptions
    {
        AuthenticationType = CookieAuthenticationDefaults.AuthenticationType,
        LoginPath = new PathString("/Account/Login"),

        // Configure SameSite as needed for your app. Lax works well for most scenarios here but
        // you may want to set SameSiteMode.None for HTTPS
        CookieSameSite = SameSiteMode.Lax,

        // More information on why the CookieManager needs to be set can be found here:
        // https://github.com/aspnet/AspNetKatana/wiki/System.Web-response-cookie-integration-issues
        CookieManager = new SameSiteCookieManager(new SystemWebCookieManager())
    });

    // Configure Auth0 authentication
    app.UseOpenIdConnectAuthentication(new OpenIdConnectAuthenticationOptions
    {
        AuthenticationType = "Auth0",

        Authority = $"https://{auth0Domain}",

        ClientId = auth0ClientId,

        RedirectUri = auth0RedirectUri,
        PostLogoutRedirectUri = auth0PostLogoutRedirectUri,

        TokenValidationParameters = new TokenValidationParameters
        {
            NameClaimType = "name"
        },

        // More information on why the CookieManager needs to be set can be found here:
        // https://docs.microsoft.com/en-us/aspnet/samesite/owin-samesite
        CookieManager = new SameSiteCookieManager(new SystemWebCookieManager()),

        Notifications = new OpenIdConnectAuthenticationNotifications
        {
            RedirectToIdentityProvider = notification =>
            {
                if (notification.ProtocolMessage.RequestType == OpenIdConnectRequestType.Logout)
                {
                    var logoutUri = $"https://{auth0Domain}/v2/logout?client_id={auth0ClientId}";

                    var postLogoutUri = notification.ProtocolMessage.PostLogoutRedirectUri;
                    if (!string.IsNullOrEmpty(postLogoutUri))
                    {
                        if (postLogoutUri.StartsWith("/"))
                        {
                            // transform to absolute
                            var request = notification.Request;
                            postLogoutUri = request.Scheme + "://" + request.Host + request.PathBase + postLogoutUri;
                        }
                        logoutUri += $"&returnTo={ Uri.EscapeDataString(postLogoutUri)}";
                    }

                    notification.Response.Redirect(logoutUri);
                    notification.HandleResponse();
                }
                return Task.FromResult(0);
            }
        }
    });
}
Was this helpful?
It is essential that you register both the cookie middleware and the OpenID Connect middleware, as they are required (in that order) for the authentication to work. The OpenID Connect middleware will handle the authentication with Auth0. Once the user has authenticated, their identity will be stored in the cookie middleware.
In the code snippet above, note that the AuthenticationType is set to Auth0. This will be used in the next section to challenge the OpenID Connect middleware and start the authentication flow. Also note code in the RedirectToIdentityProvider notification event which constructs the correct logout URL.
Trigger Authentication
Add Login and Logout methods
Next, you will need to add Login and Logout actions to the AccountController.
The Login action will challenge the OpenID Connect middleware to start the authentication flow. For the Logout action, you will need to sign the user out of the cookie middleware (which will clear the local application session), as well as the OpenID Connect middleware. For more information, you can refer to the Auth0 Logout documentation.
// Controllers/AccountController.cs

public class AccountController : Controller
{
    public ActionResult Login(string returnUrl)
    {
        HttpContext.GetOwinContext().Authentication.Challenge(new AuthenticationProperties
            {
                RedirectUri = returnUrl ?? Url.Action("Index", "Home")
            },
            "Auth0");
        return new HttpUnauthorizedResult();
    }

    [Authorize]
    public void Logout()
    {
        HttpContext.GetOwinContext().Authentication.SignOut(CookieAuthenticationDefaults.AuthenticationType);
        HttpContext.GetOwinContext().Authentication.SignOut("Auth0");
    }

    [Authorize]
    public ActionResult Claims()
    {
        return View();
    }
}
Was this helpful?
Add Login and Logout links
To add the Login and Logout links to the navigation bar, head over to /Views/Shared/_Layout.cshtml and add code to the navigation bar section which displays a Logout link when the user is authenticated, otherwise a Login link. These will link to the Logout and Login actions of the AccountController respectively:
<!-- Views/Shared/_Layout.cshtml -->

<div class="navbar navbar-inverse navbar-fixed-top">
    <div class="container">
        <div class="navbar-header">
            <button type="button" class="navbar-toggle" data-toggle="collapse" data-target=".navbar-collapse">
                <span class="icon-bar"></span>
                <span class="icon-bar"></span>
                <span class="icon-bar"></span>
            </button>
            @Html.ActionLink("Application name", "Index", "Home", new { area = "" }, new { @class = "navbar-brand" })
        </div>
        <div class="navbar-collapse collapse">
            <ul class="nav navbar-nav">
                <li>@Html.ActionLink("Home", "Index", "Home")</li>
            </ul>
            <ul class="nav navbar-nav navbar-right">
                @if (User.Identity.IsAuthenticated)
                {
                    <li>@Html.ActionLink("Logout", "Logout", "Account")</li>
                }
                else
                {
                    <li>@Html.ActionLink("Login", "Login", "Account")</li>
                }
            </ul>
        </div>
    </div>
</div>
Was this helpful?
Obtain an Access Token for calling an API
If you want to call an API from your MVC application, you need to obtain an Access Token issued for the API you want to call. To receive and Access Token, pass an additional audience parameter containing the API identifier to the Auth0 authorization endpoint.
You will also need to configure the OpenID Connect middleware to add the ID Token and Access Token as claims on the ClaimsIdentity.
Update the OpenID Connect middleware registration in your Startup class as follows:
- Set the
ResponseTypetoOpenIdConnectResponseType.Code. This will inform the OpenID Connect middleware to extract the Access Token and store it in theProtocolMessage. - Set
RedeemCodetotrue. - Set the
ClientSecretto the application's Client Secret, which you can find in your Auth0 dashboard. - Handle the
RedirectToIdentityProviderto check to an authentication request and add theaudienceparameter. - Handle the
SecurityTokenValidatedto extract the ID Token and Access Token from theProtocolMessageand store them as claims.
// Startup.cs

public void Configuration(IAppBuilder app)
{
    // Some code omitted for brevity...

    string auth0ClientSecret = ConfigurationManager.AppSettings["auth0:ClientSecret"];
    string auth0Audience = ConfigurationManager.AppSettings["auth0:Audience"];

    // Configure Auth0 authentication
    app.UseOpenIdConnectAuthentication(new OpenIdConnectAuthenticationOptions
    {
        //...

        ClientSecret = auth0ClientSecret,
        ResponseType = OpenIdConnectResponseType.Code,
        RedeemCode = true,
        //...

        Notifications = new OpenIdConnectAuthenticationNotifications
        {
            SecurityTokenValidated = notification =>
            {
                notification.AuthenticationTicket.Identity.AddClaim(new Claim("id_token", notification.ProtocolMessage.IdToken));
                notification.AuthenticationTicket.Identity.AddClaim(new Claim("access_token", notification.ProtocolMessage.AccessToken));

                return Task.FromResult(0);
            },
            RedirectToIdentityProvider = notification =>
            {
                if (notification.ProtocolMessage.RequestType == OpenIdConnectRequestType.Authentication)
                {
                    // The context's ProtocolMessage can be used to pass along additional query parameters
                    // to Auth0's /authorize endpoint.
                    //
                    // Set the audience query parameter to the API identifier to ensure the returned Access Tokens can be used
                    // to call protected endpoints on the corresponding API.
                    notification.ProtocolMessage.SetParameter("audience", auth0Audience);
                }
                else if (notification.ProtocolMessage.RequestType == OpenIdConnectRequestType.Logout)
                {
                    //...
                }
                return Task.FromResult(0);
            }
        }
    });

}
Was this helpful?
As the above snippet is reading the Auth0:ClientSecret and Auth0:Audience from the appSettings, ensure they exist in your web.config and has their values set to the corresponding API Identifier for which you want to be retrieving an Access Token as well as the Client Secret for the application whose Client ID has been registered.
<configuration>
  <appSettings>
    <add key="auth0:ClientSecret" value="{CLIENT_SECRET}" />
    <add key="auth0:Audience" value="{API_IDENTIFIER}" />
  </appSettings>
</configuration>
Was this helpful?
To access the ID Token and Access Token from one of your controllers, cast the User.Identity property to a ClaimsIdentity, and then find the particular claim by calling the FindFirst method.
// Controllers/AccountController.cs

[Authorize]
public ActionResult Tokens()
{
    var claimsIdentity = User.Identity as ClaimsIdentity;

    // Extract tokens
    string accessToken = claimsIdentity?.FindFirst(c => c.Type == "access_token")?.Value;
    string idToken = claimsIdentity?.FindFirst(c => c.Type == "id_token")?.Value;

    // Now you can use the tokens as appropriate...
}
Was this helpful?