ASP.NET (OWIN): User Profile
By Damien Guard
This tutorial demonstrates how to get the user's profile and display it. We recommend that you log in to follow this quickstart with examples configured for your account.
I want to integrate with my app
15 minutesI want to explore a sample app
2 minutesGet a sample configured with your account settings or check it out on Github.
Getting the profile
The OpenID Connect middleware will automatically retrieve the user's information from Auth0 and add it as claims to the ClaimsIdentity. The seed project contains a controller action and view which will display the claims associated with a particular user. Once a user has signed in, you can go to /Account/Claims to see these claims.
By default, the email claim is not included in the list of claims returned by Auth0. You will need to request it explicitly by requesting the email scope when your register the Auth0 middleware.
Update the OpenID Connect middleware configuration and set the value of the Scope property to openid profile email:
// Startup.cs

public void Configuration(IAppBuilder app)
{
    // Some code omitted for brevity...

    // Configure Auth0 authentication
    app.UseOpenIdConnectAuthentication(new OpenIdConnectAuthenticationOptions
    {
        //...
        Scope = "openid profile email",
        //...
    });
}
Was this helpful?
You may also want to create a user profile page which will display a user's name, email address, and profile image.
First, create a view model which will contain the basic user profile information, such as a Name, EmailAddress, and ProfileImage:
// ViewModels/UserProfileViewModel.cs

public class UserProfileViewModel
{
    public string EmailAddress { get; set; }

    public string Name { get; set; }

    public string ProfileImage { get; set; }
}
Was this helpful?
Add a new UserProfile action to the AccountController, extract the relevant claims and add them to a new instance of UserProfileViewModel which is then passed to the view. Be sure to decorate the action with the [Authorize] attribute so only authenticated users can access the action:
// Controllers/AccountController.cs

[Authorize]
public ActionResult UserProfile()
{
    var claimsIdentity = User.Identity as ClaimsIdentity;

    return View(new UserProfileViewModel()
    {
        Name = claimsIdentity?.FindFirst(c => c.Type == claimsIdentity.NameClaimType)?.Value,
        EmailAddress = claimsIdentity?.FindFirst(c => c.Type == ClaimTypes.Email)?.Value,
        ProfileImage = claimsIdentity?.FindFirst(c => c.Type == "picture")?.Value
    });
}
Was this helpful?
Next, create a view. For the view, display the user's name, email address and profile image.
<!-- Views/Account/UserProfile.cshtml -->

@model global::MvcApplication.ViewModels.UserProfileViewModel
@{
    ViewData["Title"] = "User Profile";
}

<div class="row">
    <div class="col-md-12">
        <div class="row">
            <h2>@ViewData["Title"].</h2>

            <div class="col-md-2">
                <img src="@Model.ProfileImage"
                     alt="" class="img-rounded img-responsive" />
            </div>
            <div class="col-md-4">
                <h3>@Model.Name</h3>
                <p>
                    <i class="glyphicon glyphicon-envelope"></i> @Model.EmailAddress
                </p>
            </div>
        </div>
    </div>
</div>
Was this helpful?
Now when you log in and then go to the URL /Account/UserProfile you will see the user's profile displayed.
Displaying the User's Name in the Navigation Bar
You may also want to put a link in the top navigation bar to display the user's name, and when the user clicks on that, you can navigate them to their Profile page.
Go to the Views/Shared/_Layout.cshtml file and update the Navbar section which displays the Login and Logout options to also display the user's name and link to the UserProfile action in the AccountController:
<!-- Views/Shared/_Layout.cshtml -->

<ul class="nav navbar-nav navbar-right">
@if (User.Identity.IsAuthenticated)
{
    <li>@Html.ActionLink("Hello " + User.Identity.Name, "UserProfile", "Account")</li>
    <li>@Html.ActionLink("Logout", "Logout", "Account")</li>
}
else
{
    <li>@Html.ActionLink("Login", "Login", "Account")</li>
}
</ul>
Was this helpful?
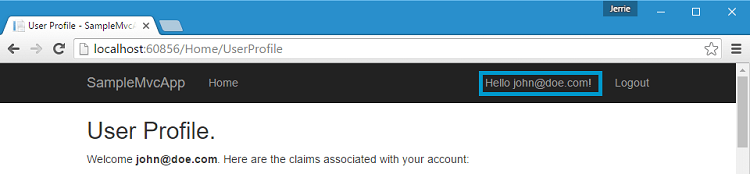
Now, after the user has logged in you will be able to see their name in the top right corner of the navigation bar: