GDPR: Track Consent with Lock
In this tutorial, we will see how you can use Lock to ask for consent information, and then save this input in the user's metadata. To learn more, read Understand How Metadata Works in User Profiles.
The contents of this document are not intended to be legal advice, nor should they be considered a substitute for legal assistance. The final responsibility for understanding and complying with GDPR resides with you, though Auth0 will assist you in meeting GDPR requirements where possible.
Overview
We will configure a simple JavaScript Single-Page Application and a database connection (we will use Auth0's infrastructure, instead of setting up our own database).
Instead of building an app from scratch, we will use Auth0's JavaScript Quickstart sample. We will also use Auth0's Universal Login pages so we can implement a Universal Login experience, instead of embedding the login in our app. To learn more about Universal Login, read Auth0 Universal Login. To learn more about the differences between Universal Login and embedded login, read Centralized Universal Login vs. Embedded Login.
We will capture consent information, under various scenarios, and save this at the user's metadata.
All scenarios will save the following properties at the user's metadata:
a
consentGivenproperty, with true/false values, shows if the user has provided consent (true) or not (false)a
consentTimestampproperty, holding the Unix timestamp of when the user-provided consent
For example:
{
  "consentGiven": "true"
  "consentTimestamp": "1525101183"
}
Was this helpful?
We will see three different implementations for this:
one that displays links to other pages where the Terms & Conditions and/or privacy policy information can be reviewed
one that adds custom fields at the signup widget and works for database connections
one that redirects to another page where the user can provide consent, and works for social connections
Configure the application
Go to Auth0 Dashboard > Applications > Applications and create a new application. Choose
Single Web Page Applicationsas type.Go to Settings and set the Allowed Callback URLs to
http://localhost:3000.This field holds the set of URLs to which Auth0 is allowed to redirect the users after they authenticate. Our sample app will run at
http://localhost:3000hence we set this value.Copy the Client Id and Domain values. You will need them in a while.
Go to Auth0 Dashboard > Authentication > Database and create a new connection. Click Create DB Connection, set a name for the new connection, and click Save. You can also enable a social connection at Auth0 Dashboard > Authentication > Social (we will enable Google login for the purposes of this tutorial).
Go to the connection's Applications tab and make sure your newly created application is enabled.
Option 1: Display Terms & Conditions link
In this section, we will customize the login widget to add a flag that users must check in order to sign up. The flag's label will include links to pages that display the Terms & Conditions and privacy policy.
This works both for database connections and social logins.
Select the Login view, and enable the Customize Login Page toggle.
Locate the Default Templates dropdown, and select
Lock. The code block will be pre-populated for you.To add a field for the
consentGivenmetadata, use themustAcceptTermsoption. To include links to your Terms & Conditions and/or privacy policy pages, use thelanguageDictionaryoption. To learn more, read Lock Configuration Options. The example below displays text that saysI agree to the terms of service and privacy policy(including links to both pages) next to the flag:To see what this will look like, select the Preview view, then when Lock loads, select Sign Up.//code reducted for simplicity var lock = new Auth0Lock(config.clientID, config.auth0Domain, { auth: { //code reducted for simplicity }, languageDictionary: { signUpTerms: "I agree to the <a href='https://my-app-url.com/terms' target='_blank'>terms of service</a> and <a href='https://my-app-url.com/privacy' target='_blank'>privacy policy</a>." }, mustAcceptTerms: true, //code reducted for simplicity });Was this helpful?
/This flag forces users to accept the terms before they can sign up, but it does not set any metadata. To save the user's selection in the
consentGivenmetadata property, create a new Action. Enter a descriptive Name for your Action (for example,Set consent flag upon signup), select theLogin / Post Logintrigger because you’ll be adding the Action to the Login flow, then select Create.Locate the Actions Code Editor, copy the following JavaScript code into it, and select Save Draft to save your changes:
This code sets theexports.onExecutePostLogin = async (event, api) => { const { consentGiven } = event.user.user_metadata || {}; // short-circuit if the user signed up already if ( consentGiven ) { return; } // first time login/signup api.user.setUserMetadata("consentGiven", true); api.user.setUserMetadata("consentTimestamp", Date.now()); return; }Was this helpful?
/consentGivenmetadata totrueif it is not already set (which means it's the first login after a signup).From the Actions Code Editor sidebar, select Test (play icon), then select Run to test your code.
When you’re ready for the Action to go live, select Deploy.
Finally, add the Action you created to the Login Flow. To learn how to attach Actions to Flows, read the "Attach the Action to a flow" section in Write Your First Action.
Option 2: Add custom fields for database connections
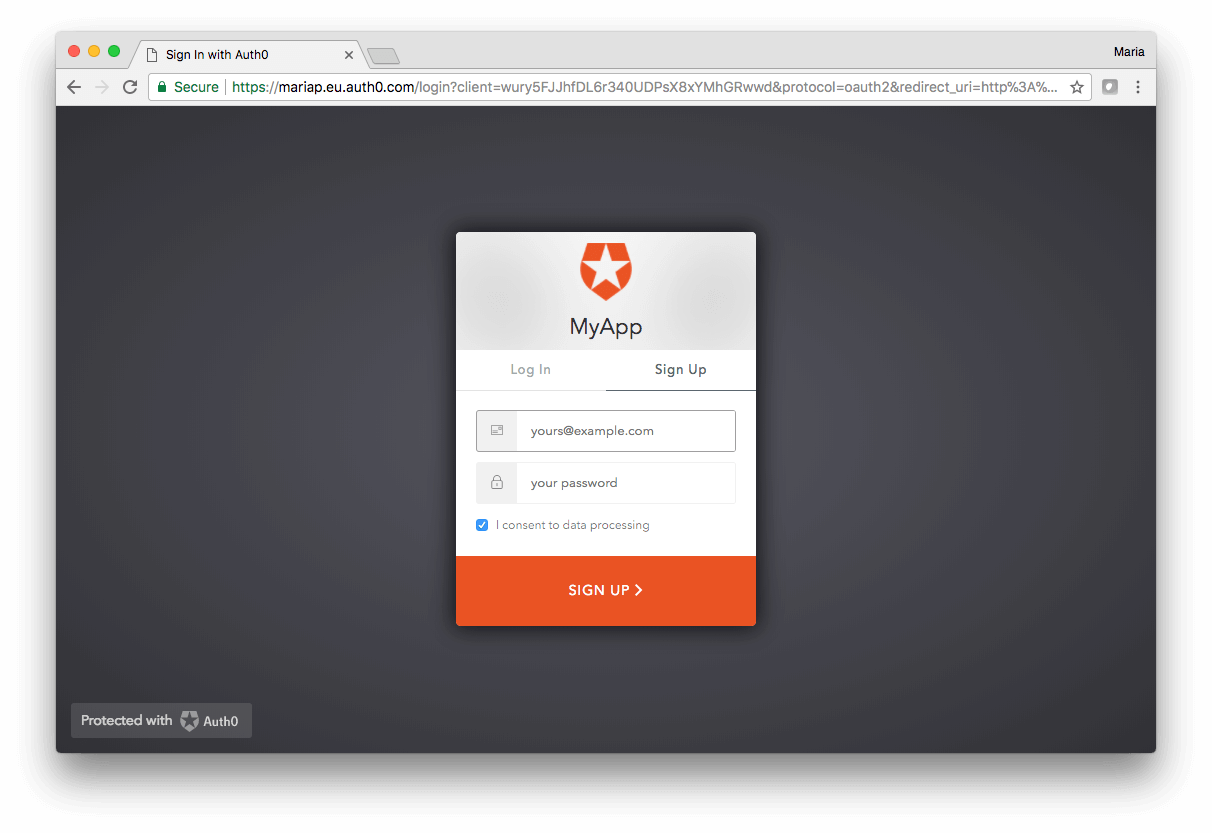
In this section, we will customize the login widget to add a flag that users will check if they agree to the processing of their information.
This works only for database connections (if you use social logins, see the next paragraph).
Navigate to Auth0 Dashboard > Branding > Universal Login.
Select the Login view, and enable the Customize Login Page toggle.
Locate the Default Templates dropdown, and select
Lock. The code block will be pre-populated for you.To add a field for the
consentGivenmetadata, use theadditionalSignUpFieldsoption. To learn more, read Lock Configuration Options. The example below sets the type tocheckbox(so we have a flag), the label toI consent to data processing, and the default value tochecked.//code reducted for simplicity var lock = new Auth0Lock(config.clientID, config.auth0Domain, { auth: { //code reducted for simplicity }, additionalSignUpFields: [{ type: "checkbox", name: "consentGiven", prefill: "true", placeholder: "I consent to data processing" }], //code reducted for simplicity });Was this helpful?
/To see what this will look like, select the Preview view, and when Lock loads, select Sign Up.
Note that in this option, we only set the flag and not the timestamp. Displaying the current time in the login widget is not optimal, that's why we didn't add an additional signup field. What you should do is set the timestamp in the background, with a rule that will check the value of consentGiven and set the additional consentTimestamp metadata to the current timestamp.
Option 3: Redirect to another page
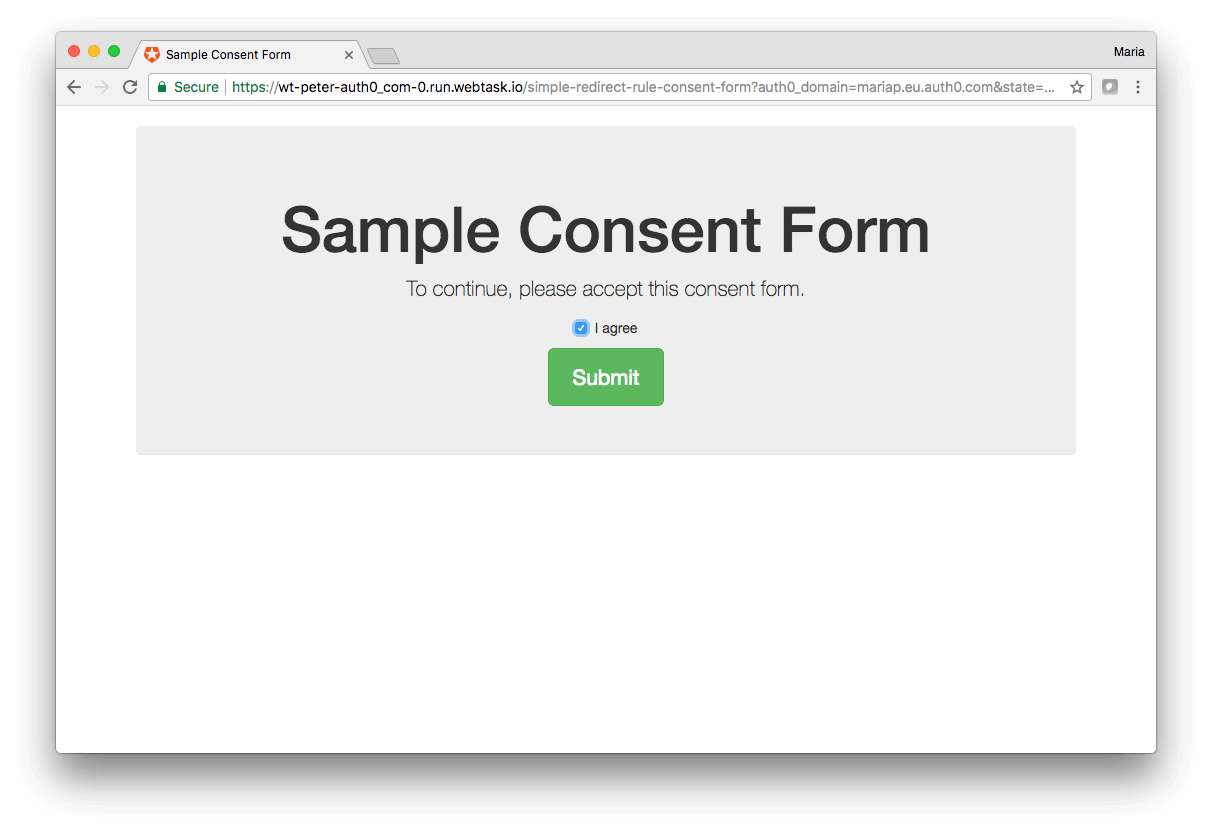
If you are using social logins, adding custom fields is not an option, but you can redirect the user to another page where you ask for consent and any additional info, and then redirect back to finish the authentication transaction. This can be done with Redirect Actions. To learn more, read Redirect with Actions. We will use this same Action to save the consent information in the user's metadata, so we can track this information and not ask for consent upon the next login.
For simplicity, we will use a sample consent form. You will need to host this form, and the URL for the form must be publicly-accessible. You'll need to provide the URL where the form can be accessed to Auth0 in Step 2. If you need a specialized consent prompt (for example, a parental consent), you must build your own custom consent form. Be aware that laws vary according to country.
Create a new Action. Enter a descriptive Name for your Action (for example,
Redirect to consent form), select theLogin / Post Logintrigger because you’ll be adding the Action to the Login flow, then select Create.Locate the Actions Code Editor, and select the Secrets (key) icon in its sidebar. Add the consent form URL as a Secret by creating a key/value pair:
Key:
CONSENT_FORM_URLValue:
your-consent-form-url.com(Be sure to provide the publicly-accessible URL where your consent form can be found.)
Copy the following JavaScript code into the Actions Code Editor, and select Save Draft to save your changes:
exports.onExecutePostLogin = async (event, api) => {
    const { consentGiven } = event.user.user_metadata || {};

    // redirect to consent form if user has not yet consented
    if (!consentGiven && api.redirect.canRedirect()) {
      const options = {
        query: {
          auth0_domain: `${event.tenant.id}.auth0.com`,
        },
      };
      api.redirect.sendUserTo(event.secrets.CONSENT_FORM_URL, options);
    }
};

// if user clicks 'I agree' on the consent form, save it to their profile so they don't get prompted again
exports.onContinuePostLogin = async (event, api) => {
  if (event.request.body.confirm === "yes") {
    api.user.setUserMetadata("consentGiven", true);
    api.user.setUserMetadata("consentTimestamp", Date.now());
    return;
  } else {
    return api.access.deny("User did not consent");
  }
};
Was this helpful?
/From the Actions Code Editor sidebar, select Test (play icon), then select Run to test your code.
When you’re ready for the Action to go live, select Deploy.
Finally, add the Action you created to the Login Flow. To learn how to attach Actions to Flows, read the "Attach the Action to a flow" section in Write Your First Action.
When setting up redirection to your consent form for use in a Production environment, be sure to review Trusted Callback URLs and Data Integrity regarding security concerns.
We are done with the configuration part; let's test!
Test the configuration
Go to the folder where you downloaded the application and run it.
npm install
    npm run
Was this helpful?
/Go to
http://localhost:3000. Click Login. Once Lock is displayed, click Sign Up. The login page will be served by default atYOUR_DOMAIN/login. To learn how to use your own domain, read Custom Domains.If you followed the first implementation option, you should see the flag to accept the terms of service and privacy policy. Note that the Sign up button remains disabled until you check the flag. Follow the links to check they are working. Set an email and password and accept the terms and click Sign Up. Alternatively, if you use a social connection, accept the terms, and choose Sign Up with Google.
If you followed the second implementation option, you should see the new custom field we added. Set an email and password and leave the
I consent to data processingflag checked. Click Sign Up.
If you followed the third implementation option, choose Sign Up with Google. You will be navigated to the consent form. Check the I agree flag and click Submit.

If you do not check the I agree flag before clicking Submit, then you will see a popup error
Unauthorized. Check the console for details.. At the console you will see this JSON:Note, that the user is created but they won't be able to log in. If they try to, they will be prompted again to provide consent.{ error: "unauthorized", errorDescription: "User did not consent!", state: "q0GjMwzZN_q5r8XPHvfakkMYcYM2q1N3" }Was this helpful?
/Go to Auth0 Dashboard > User Management > Users and search for the new user.
Go to User Details and scroll down to the Metadata section. At the user_metadata text area you should see the following:
{
      "consentGiven": "true"
      "consentTimestamp": "1525101183"
    }
Was this helpful?
/
That's it; you are done!

