Authorization Code Flow
The Authorization Code Flow (defined in OAuth 2.0 RFC 6749, section 4.1), involves exchanging an authorization code for a token.
This flow can only be used for confidential applications (such as Regular Web Applications) because the application's authentication methods are included in the exchange and must be kept secure.
How Authorization Code Flow works
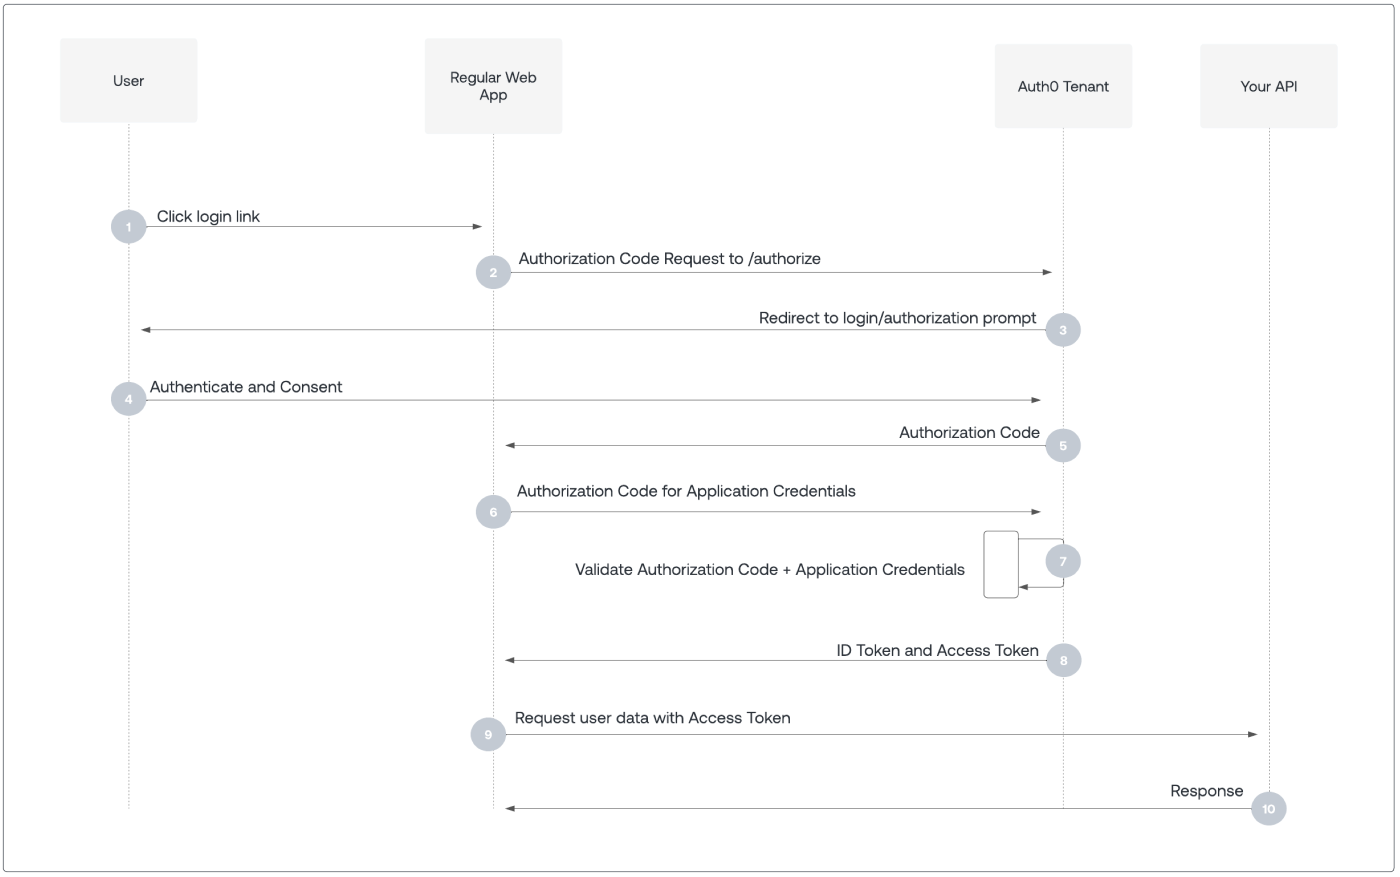
User selects Login within application.
Auth0's SDK redirects user to Auth0 Authorization Server (
/authorizeendpoint).Auth0 Authorization Server redirects user to login and authorization prompt.
User authenticates using one of the configured login options, and may see a consent prompt listing the permissions Auth0 will give to the application.
Auth0 Authorization Server redirects user back to application with single-use authorization code.
Auth0's SDK sends authorization code, application's client ID, and application's credentials, such as client secret or Private Key JWT, to Auth0 Authorization Server (
/oauth/tokenendpoint).Auth0 Authorization Server verifies authorization code, application's client ID, and application's credentials.
Auth0 Authorization Server responds with an ID token and access token (and optionally, a refresh token).
Application can use the access token to call an API to access information about the user.
API responds with requested data.
How to implement Authorization Code Flow
The easiest way to implement the Authorization Code Flow is to follow our Regular Web App Quickstarts.
Alternatively, you can use the Authentication API to implement the Authorization Code Flow. For more information, read Add Login Using the Authorization Code Flow or Call Your API Using the Authorization Code Flow.