Customize Multi-Factor Authentication Pages
You can customize the MFA pages that appear to your users by adjusting the Universal Login branding options in the Universal Login Settings section of the Auth0 Dashboard.
If you are using the Universal Login experience, you can customize the page using its flow customization options.
You can also customize the full HTML content to reflect your organization's particular user experience requirements. To learn more, read MFA Widget Theme Options.
With the Universal Login Experience, MFA is presented even more simply to the user. Once they have entered their credentials to log in, they are presented with the MFA screen. If they have no MFA factor enrolled, they will be asked to enroll, and if they do, they will be asked to present their MFA credential.
Use the MFA API
Auth0 provides an MFA API for the following scenarios:
Build an interface to let users manage their own authentication factors.
Invite users to enroll in MFA using enrollment tickets.
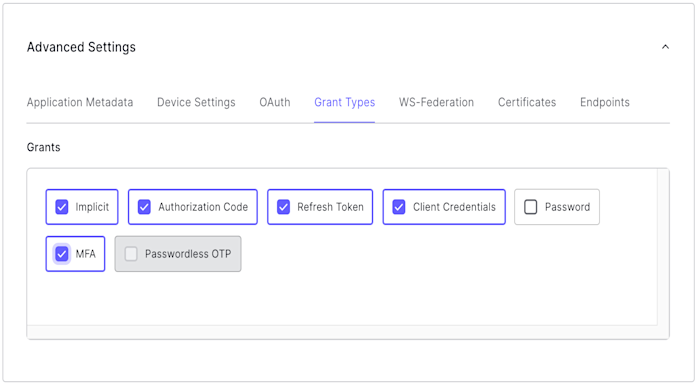
To use the MFA API, you must enable the MFA grant type for your application. To enable the MFA grant in the Auth0 Dashboard:
Go to Dashboard > Applications > Applications and select your application.
At the bottom of the Settings tab, click Advanced Settings.
Click the Grant Types tab and select MFA.
To learn more, read Enable Multi-Factor Authentication.
Click Save Changes.

Limitations
The MFA API is designed to work with SMS, push notifications within the Guardian application, email, and OTP factors. It does not support enrolling with Duo.
Customize MFA policy with Actions
You can use Actions to customize the MFA policy for your tenant, including requiring MFA for users of specific applications, users with specific user metadata or IP ranges, and more.
If you're unfamiliar with creating Actions, read Write Your First Action.
When writing Actions, you can use the provider setting to specify whether to force MFA, and which factor you use. The behavior is different depending on whether you use the Classic or the Universal Login experience:
| Provider | Classic Experience | New Experience |
|---|---|---|
| any | Push, SMS, or OTP | Push, SMS, Voice, OTP, Email, or WebAuthN security key (when enabled) |
| guardian | Push, SMS, or OTP | Push, SMS, OTP, or Email |
| google-authenticator | Google Authenticator | Push, SMS, OTP, or Email |
| duo | Duo | Duo |
If you are using Universal Login you can get the behavior of the Classic Login experience if you enable customization of the MFA login page.
Setting the provider to a specific option manually overrides the enabled/disabled toggles in the Dashboard. You can use the following Action to prompt the user to enroll in Duo even if other factors are enabled in the Dashboard:
exports.onExecutePostLogin = async (event, api) => {
    // Forcing the provider to Duo programmatically
    api.multifactor.enable('duo')
}
Was this helpful?
Common use case examples
Here are some common contextual MFA scenarios that can be handled by Actions.
Require MFA for specific applications
You can customize MFA to only trigger when users are logging in to to specific applications.
exports.onExecutePostLogin = async (event, api) => {
	const CLIENTS_WITH_MFA = [
		'{yourClientId1}',
		'{yourClientId2}',
		'{yourClientId3}'
	];

	if (CLIENTS_WITH_MFA.includes(event.client.client_id)) {
		api.multifactor.enable('duo', { allowRememberBrowser: false })
	}
}
Was this helpful?
Require MFA for specific users
You can customize MFA to only trigger for users who are marked to use MFA.
exports.onExecutePostLogin = async (event, api) => {
  if (event.user.user_metadata && event.user.user_metadata.use_mfa) {
    api.multifactor.enable('duo', { allowRememberBrowser: false });
  }
}
Was this helpful?
Change frequency of MFA prompts
In some scenarios, you may not want to prompt the user for MFA each time they log in from the same browser. You can alter that behavior by using the allowRememberBrowser property:
exports.onExecutePostLogin = async (event, api) => {
  api.multifactor.enable('any', { allowRememberBrowser: false });
}
Was this helpful?
Depending on the property value the behavior will be as follows:
| Value | Description |
|---|---|
true |
When provider is set to google-authenticator or duo, the user is prompted for MFA once every 30 days. When provider is set to guardian, the MFA prompt displays the enrollment checkbox for users to choose whether or not to enroll. Defaults to false. To learn more, read Customize Multi-Factor Authentication Pages |
false |
The user is prompted for MFA each time they authenticate. |
The time values are for active users. If a user is inactive for a period of seven days or more, their cookie will expire and they will be prompted for MFA on their next login attempt (regardless if allowRememberBrowser is set to true and it has not been 30 days since their last MFA prompt).
When you allow the user to skip MFA, a cookie is stored in the user's browser. If the user has the cookie set but you still want to require MFA, you have two options:
Set
allowRememberBrowsertofalseSet
acr_valuestohttp://schemas.openid.net/pape/policies/2007/06/multi-factorwhen calling the/authorizeendpoint.
In situations where a user loses a trusted device, you can prompt the specific user for MFA during their next login by calling the Auth0 Management API Invalidate Remember Browser endpoint.
Require MFA for users outside of the network
Assuming that access to the specified network of internal IP addresses is well controlled, you can also have Auth0 request MFA only from users whose requests originate from outside the corporate network:
exports.onExecutePostLogin = async (event, api) => {
  const ipaddr = require('ipaddr.js@1.9.0');
  const corp_network = '192.168.1.134/26';
  const current_ip = ipaddr.parse(event.request.ip);

  if (!current_ip.match(ipaddr.parseCIDR(corp_network))) {
    api.multifactor.enable('any', {allowRememberBrowser: false});
  }
}
Was this helpful?
Bypass MFA for refresh token requests
If your users report frequent log-outs, you may need to bypass refresh token requests while using MFA. You can alter the default behavior with a filter Action on the event.transaction.protocol object property.
exports.onExecutePostLogin = async (event, api) => {
  if (event.transaction.protocol !== 'oauth2-refresh-token') {
    // MFA-related commands here
    api.multifactor.enable('any');
  }
};
Was this helpful?
To learn more about the Action event object, read Actions Triggers: post-login - Event Object.