Export Logs to AWS CloudWatch
The Auth0 Logs to AWS CloudWatch extension consists of a scheduled job that exports your Auth0 logs to CloudWatch, which is a monitoring and management service built for developers, system operators, site reliability engineers (SRE), and IT managers. This document will guide you through the process of setting up this integration.
To learn more, read Amazon CloudWatch in AWS documentation.
Configure the extension
To install and configure this extension:
Navigate to Auth0 Dashboard > Extensions, and select Auth0 Logs to CloudWatch. The Install Extension window opens.
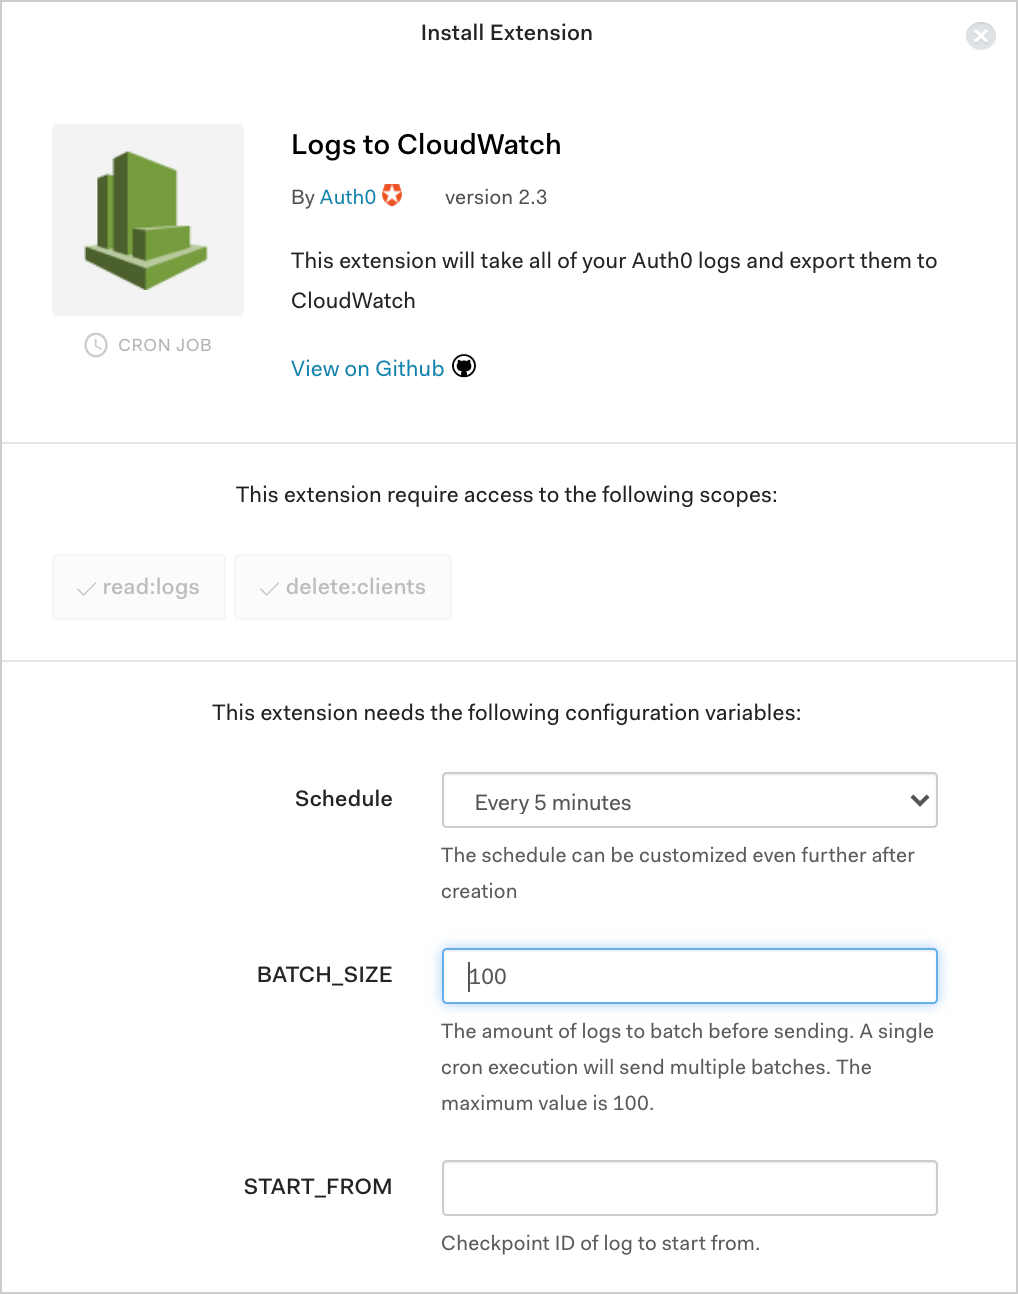
Set the following configuration parameters:

Schedule: The frequency with which logs should be exported. The schedule can be customized even further after creation.
BATCH_SIZE: The number of logs to be sent per batch. Maximum is
100. Logs are batched before sending, and multiple batches are sent each time the extension runs.START_FROM: The checkpoint ID of the log from which you want to start sending.
SLACK_INCOMING_WEBHOOK_URL: The specific Slack webhook to which you want to send reports from the extension.
SLACK_SEND_SUCCESS: Choose whether to send verbose notifications to Slack. Useful for troubleshooting.
LOG_LEVEL: The minimal log level of events that you would like sent to Papertrail.
LOG_TYPES: The events for which logs should be exported.
CLOUDWATCH_LOG_GROUP_NAME: Your CloudWatch log group name.
CLOUDWATCH_LOG_STREAM_NAME: Your CloudWatch log stream name.
AWS_ACCESS_KEY_ID: Your AWS access key ID.
AWS_SECRET_KEY: Your AWS secret key.
AWS_REGION: Your AWS region.
Required permissions
To send logs to CloudWatch, the extension requires the following AWS permissions:
logs:PutLogEventslogs:DescribeLogStreams
After you provide this information, select Install to finish installing the extension.
The integration between Auth0 and CloudWatch is now in place!
Batch size
When setting your BATCH_SIZE, please keep the following information in mind.
During each time frame/window (defined by your chosen Schedule), outstanding logs will be batched into groups and sent. The size of each group is determined by the BATCH_SIZE value.
In other words, during each window, NUM_BATCHES batches of logs will be sent based on the following logic:
IF (NUM_LOGS modulo 100 == 0):
  NUM_BATCHES = (NUM_LOGS / BATCH_SIZE)
ELSE:
  NUM_BATCHES = (NUM_LOGS / BATCH_SIZE) + 1
In the ELSE case, the last batch will have < 100 logs.
View results
The integration you just set up created a scheduled job that is responsible for exporting the logs. To view this scheduled job:
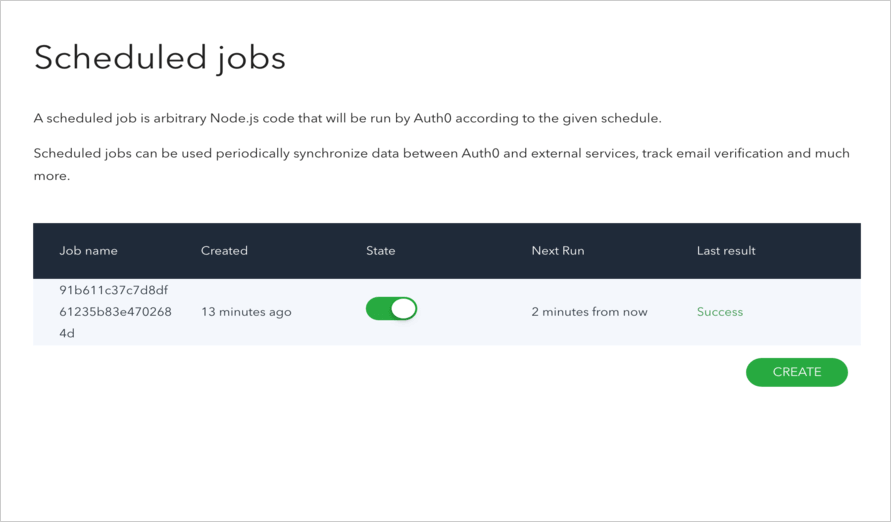
Navigate to Auth0 Dashboard > Extensions, and select Installed Extensions.
Select Auth0 Logs to CloudWatch. The job you just created appears. You can modify its state by toggling the State switch, see when the next run is due, and see the result of the last execution.

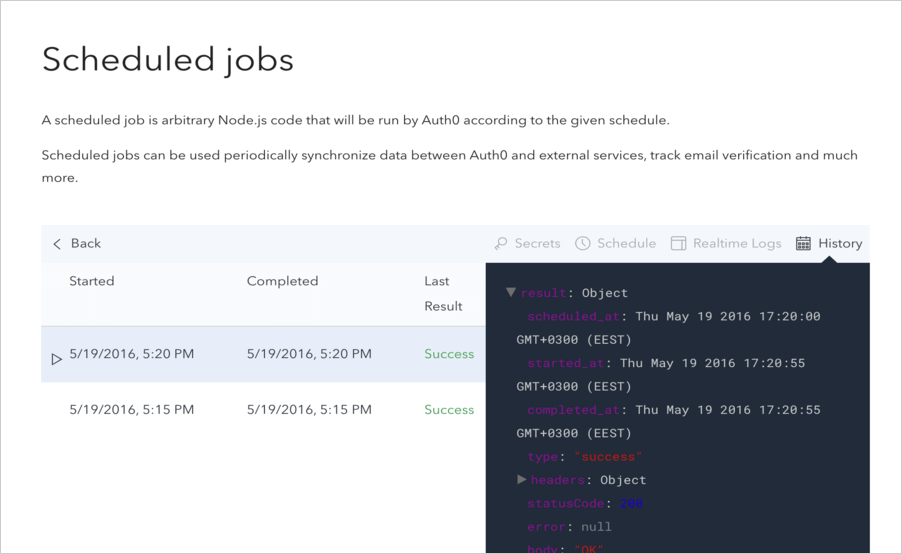
You can view more details by clicking on the job you created. On this page, you can view details for each execution, reschedule the job, access realtime logs, and more.
Replay logs
In the event of a CloudWatch failure or service interruption, you can replay the logs starting from the failed log.
To replay logs:
Get the checkpoint ID of the failed log.
Navigate to Auth0 Dashboard > Extensions, and select Installed Extensions.
Select the gear icon to view Auth0 Logs to CloudWatch extension settings.
Enter the checkpoint ID in the START_FROM field.
Select Save.
Integrate with Slack
This extension can send failed transaction notifications to Slack with the checkpoint code displayed in the message. To set up the integration:
Get the Slack Incoming Webhook URL.
Navigate to Auth0 Dashboard > Extensions, and select Installed Extensions.
Select the gear icon to view Auth0 Logs to CloudWatch extension settings.
Enter the Slack Incoming Webhook URL in the SLACK_INCOMING_WEBHOOK field.
Select Save.
You can also enable verbose notifications by enabling the SLACK_SEND_SUCCESS setting.