Configure TeleSign as MFA SMS Provider
You can send multi-factor authentication (MFA) text messages using Telesign. Telesign provides two different APIs, both of which may be used alongside Auth0 to deliver multi-factor verification via text messages:
TeleSign SMS: Allows you to build and manage SMS communications and security verification processes.
TeleSign SMS Verify: Helps you manage the SMS verification process and is available in the Enterprise plan.
The following steps will add text-message-based MFA to the login flow for the tenant in which you're working. We highly recommend testing this setup on a staging or development server before making the changes to your production login flow.
To configure a custom SMS provider for MFA using Telesign, you will:
Create a Send Phone Message hook
Configure hook secrets
Add the Telesign call
Test your hook implementation
Activate the custom SMS factor
Test the MFA flow
Optional: Troubleshoot
Prerequisites
Log in to your TeleSign portal (either the TeleSign Enterprise Portal or the TeleSign Standard Portal).
Capture the Customer ID and API Keys from your TeleSign account.
Create Send Phone Message hook
You will need to create a Send Phone Message hook, which will hold the code and secrets of your custom implementation. You can only have one Send Phone Message hook active at a time.
Configure hook secrets
Add the following hook secrets with the keys and corresponding values:
TELESIGN_CUSTOMER_IDTELESIGN_API_KEY
Add Telesign API call
To make the call to Telesign, add the appropriate code to the hook. Copy the code block below and edit the Send Phone Message hook code to include it. This function will run each time a user requires MFA, calling Telesign to send a verification code via SMS.
SMS API
If you are calling the SMS API, use the following code:
/**
@param {string} recipient - phone number
@param {string} text - message body
@param {object} context - additional authorization context
@param {string} context.factor_type - 'first' or 'second'
@param {string} context.message_type - 'sms' or 'voice'
@param {string} context.action - 'enrollment' or 'authentication'
@param {string} context.language - language used by login flow
@param {string} context.code - one time password
@param {string} context.ip - ip address
@param {string} context.user_agent - user agent making the authentication request
@param {string} context.client_id - to send different messages depending on the client id
@param {string} context.name - to include it in the SMS message
@param {object} context.client_metadata - metadata from client
@param {object} context.user - To customize messages for the user
@param {function} cb - function (error, response)
*/
module.exports = function (recipient, text, context, cb) {

  const axios = require('axios').default;
  const querystring = require('querystring');

  const customerId = context.webtask.secrets.TELESIGN_CUSTOMER_ID;
  const restApiKey = context.webtask.secrets.TELESIGN_REST_API_KEY;

  const instance = axios.create({
    // If you are using the standard TeleSign plan the URL should be https://rest-api.telesign.com/
    baseURL: "https://rest-ww.telesign.com",
    headers: {
      'Content-Type': 'application/x-www-form-urlencoded'
    },
  });

  instance({
    method: 'post',
    auth: {
      username: customerId,
      password: restApiKey
    },
    url: '/v1/messaging',
    data: querystring.stringify({
      phone_number: recipient,
      message_type: 'ARN',
      message: text
    })
  })
  .then((response) => {
    cb(null, {});

  })
  .catch((error) => {
    cb(error);
  });
}
Was this helpful?
SMS Verify API
If you are calling the SMS Verify API, use the following code:
module.exports = function(recipient, text, context, cb) {

  const axios = require('axios').default;
  const querystring = require('querystring');

  const customerId =  context.webtask.secrets.TELESIGN_CUSTOMER_ID;
  const restApiKey = context.webtask.secrets.TELESIGN_API_KEY;

  const instance = axios.create({
    baseURL: "https://rest-ww.telesign.com",
    headers: {
      'Content-Type': 'application/x-www-form-urlencoded'
    },
  });

  instance({
    method: 'post',
    auth: {
      username: customerId,
      password: restApiKey
    },
    url: '/v1/verify/sms',
    data: querystring.stringify({
      phone_number: recipient,
      template: text
    })
  })
  .then((response) => {
      cb(null, {});
  })
  .catch((error) => {
      cb(error);
  });
}
Was this helpful?
Test hook implementation
Click the Run icon on the top right to test the hook. Edit the parameters to specify the phone number to receive the SMS, and click the Run button.
Activate the custom SMS factor
To use the SMS factor, your tenant needs to have MFA enabled globally or required for specific contexts using rules. To learn how to enable the MFA feature, see:
The hook is now ready to send MFA codes. The last steps are to configure the SMS Factor to use the custom code and test the MFA flow.
Go to Dashboard > Multifactor Auth and click the SMS factor box.
In the modal that appears, select Custom for the SMS Delivery Provider, then make any adjustments you'd like to the templates. Click Save when complete, and close the modal.
Enable the SMS factor using the toggle switch.
Test MFA flow
Trigger an MFA flow and verify that everything works as intended.
Troubleshoot
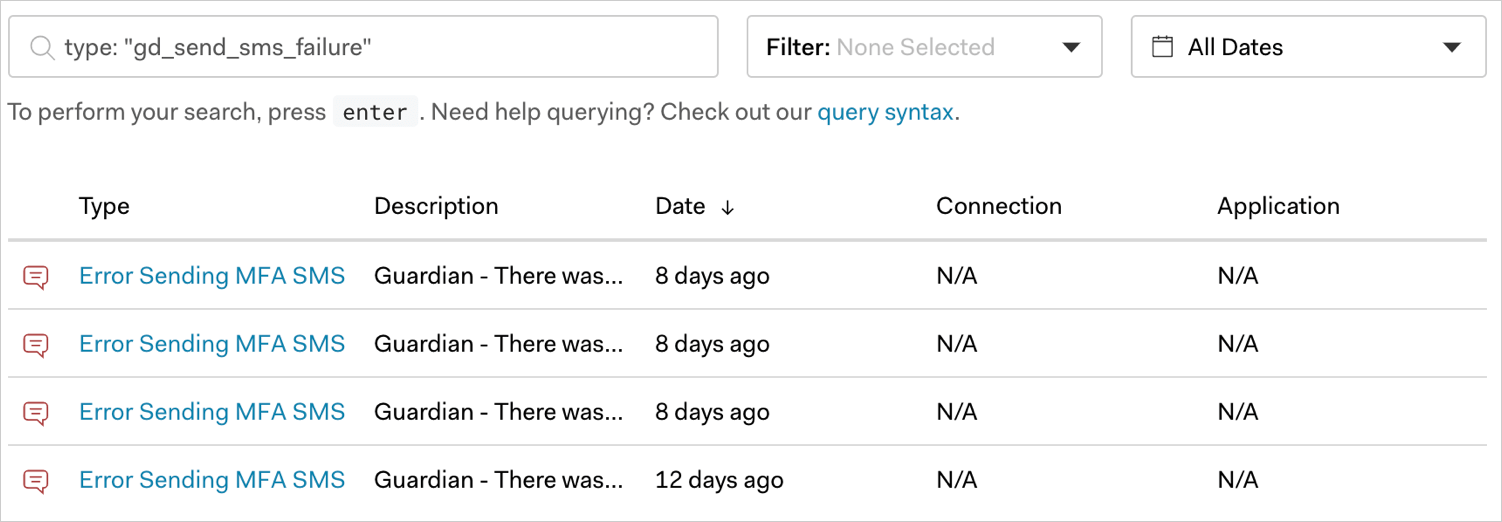
If you do not receive the text message, look at the hook logs. Look for a failed SMS log entry. To learn which event types to search, see the Log Event Type Code list, or you can use the Filter control to find MFA errors.
Make sure that:
The Hook is active and the SMS configuration is set to use
Custom.You have configured the hook secrets.
The configured hook secrets are the same ones provided in the TeleSign portal.
Your phone number is formatted using the E.164 format.